You love how smooth your car idles and accelerates, like butter in a warm skillet. But over time, that smooth-running car just seems to have gotten the shivers. Little by little, maybe you didn't even notice, the engine mounts break down and will eventually fail. That smooth-as-silk engine you love suddenly behaves like a two-year-old on sugar overload, shaking and bouncing around at idle and thumping around every time you accelerate. Driving with broken engine mounts can damage your vehicle, but also significantly reduces performance and efficiency. Checking and replacing engine mounts is often an easy DIY job the average home mechanic can complete in his driveway for a reasonable amount of money. To help you with that, here's everything you need to know about engine mounts, what happens when one breaks, and if it's actually safe to drive around with broken engine mounts.
What it's Like to Drive with Broken Engine Mounts
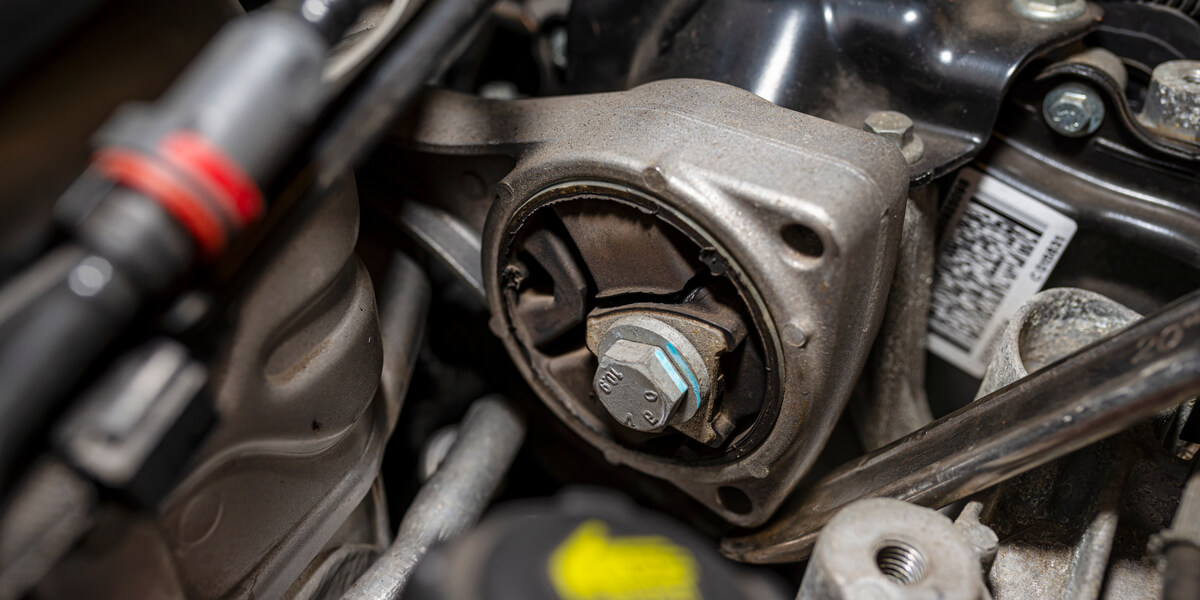
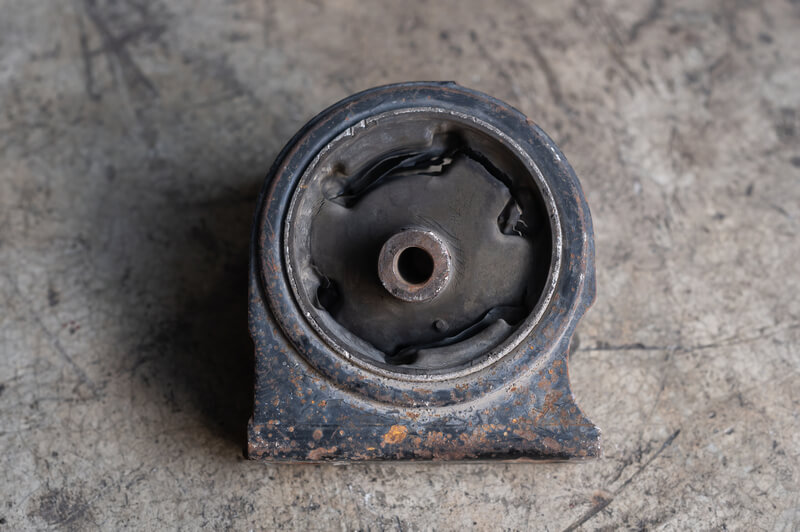
The first thing most drivers will notice when dealing with a car that has failing engine mounts is excessive vibration. It makes sense once you understand how a motor mount works in the car. Engine mounts are essentially a dense rubber block supported by metal brackets that bolt independently to the engine and the frame of the vehicle. It allows the engine to vibrate without transmitting the vibration into the body of the car. Motor mounts will also enable the engine to torque or rise slightly under acceleration.
If the mounts were solid pieces of metal, the chassis of the vehicle would take a beating from the constant vibration coming from the engine. Chances are good that most drivers would not be comfortable with a car that has solid mounts. That's why engine mounts are usually made of rubber or polyurethane in case of race cars. When a motor mount is broken, the engine can vibrate and move at will, which is not what the driver wants at all. When engine mounts have failed completely, the engine can move as much as a foot, and could crush accessories like the air filter box, damaging exhaust pipes (especially flex pipes and gaskets), and cooling lines.
A car with broken motor mounts does not accelerate as well because the rotation of the engine is excessive. The excessive rotation reduces the smoothness and immediacy of acceleration. The situation is made worse by drivers that don't know the mount is the problem and keep driving or even driving the car harder to overcome the issue.

Diagnosing a Broken Engine Mount
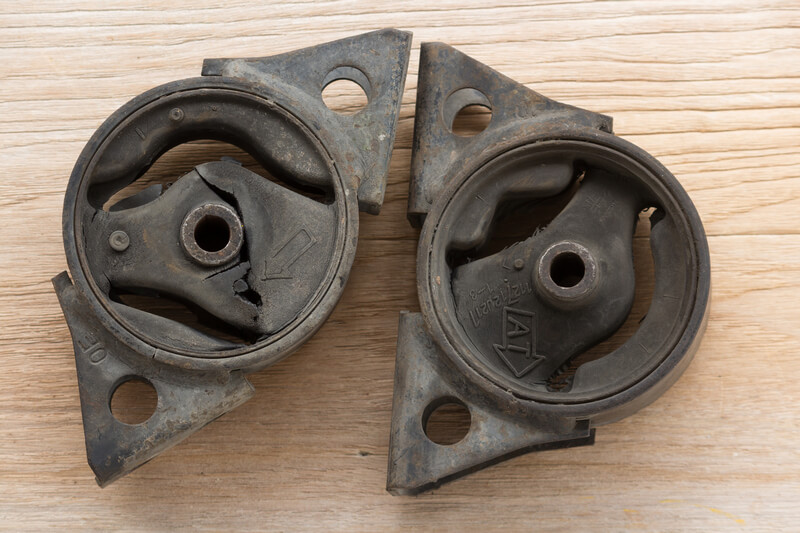
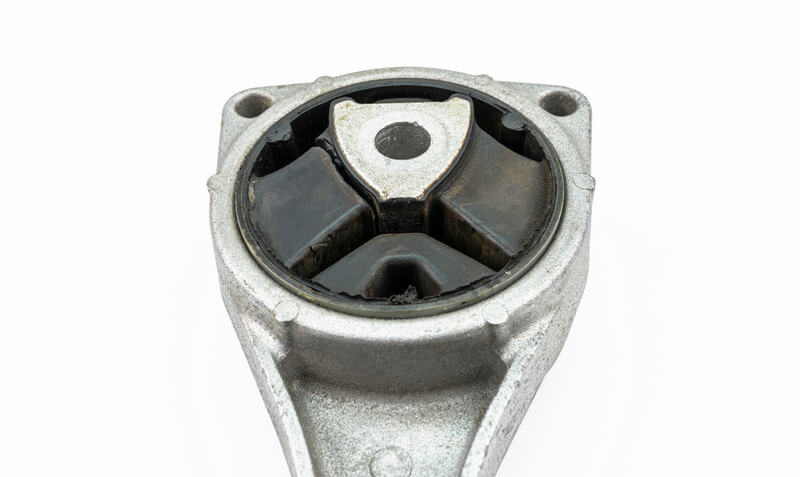
Drivers can very quickly diagnose a broken engine mount, but figuring out if a mount is simply worn a little is more challenging. Worn mounts will seem fine but allow too much vibration. Only experience with engines can tell the DIYer if the vibration from the engine is too much. Many engine mounts have cracks in the rubber, look distorted, and seem like they should be no good, when in fact, driving is totally safe. Other times, a motor mount may be broken, while it looks safe to drive with. There are some simple ways drivers can inspect engine mounts and diagnose the extent of the problem quite easily.
Step 1: Look and Listen for Signs of Failed Mounts
The first step a DIY mechanic should take to diagnose a broken motor mount is observation. Open the hood and have an assistant start the engine. Watch the movement of the engine as it is starting. When the engine cranks over, a tremendous amount of rotational force is applied to the engine mounts. Worn or broken mounts will be the most obvious when starting the engine or when slightly revving the engine while the brakes are applied. Excessive engine movement is a clear sign of worn or broken mounts.
Step 2: Lift and Observe Mounts for Damage
With the engine turned off, place a jack underneath the engine. Find a place that the jack can press against without damaging components. It might be necessary to use a block of wood or some other object to get a solid point to lift. You won't need to lift it that high, so it isn't essential to brace anything at this point. Raise the jack until it just makes contact with the engine, then slowly raise the jack a little.
As the weight of the engine is taken off the mount, keep an eye on the rubber portion. Good engine mounts will only allow a small amount of lift before the engine will not go up anymore. Do not force the engine up as severe damage can occur. On a broken motor mount, you should be able to see the rubber part separate from the outer casing or inner metal sleeve. Once you have found the lousy mount, gently set the engine back down.

How to Replace Engine Mounts Safely
Broken engine mounts can cause damage to various other components, so owners need to replace failed mounts as quickly as possible. Motor mounts for front-wheel-drive cars are different from rear-wheel-drive vehicles, and different procedures may apply. When in doubt, make sure to get your hands on your car's repair manual first so you can follow the specific replacement procedure for your vehicle.
Replace Front-Wheel-Drive Engine Mounts
Most cars with front-wheel-drive (FWD) configurations use a support member to hold the engine. Mechanics call this support the K-frame or crossmember. Its name comes from the K-like shape the support often resembles. The K-frame holds the engine and transmission, along with the engine mounts and transmission mounts. To replace motor mounts on a FWD, you may sometime need to lower the K-frame. The safest way to lower the K-frame is to support the car on sturdy jack stands, then place a hydraulic jack under the centermost part of the K-frame, unbolt it and lower it. The frame usually attaches with several large bolts at the points of the K shape.
The mechanic will need to carefully loosen or remove the bolts while making sure the K-frame is supported with the jack. The engine can be held in place with stands, or you can remove the cross-member mount bolts first.
Make sure to install the new motor mount in the same orientation as the original one. Lift the K-frame back into place and secure it to the frame while ensuring the new mount lines up correctly with the engine. Don't forget to torque the bolts to the specification found in your workshop manual.
Replace Rear-Wheel-Drive Motor Mounts
Mounts for rear-wheel-drive vehicles can be somewhat easier to replace. The first step is to raise the car and support the frame on sturdy jack stands. Use a hydraulic jack under the engine with a piece of wood to prevent damage. Most engines can lift free of the mounts when the block of wood and jack are close to the front of the oil pan near the crankshaft pulley. Only lift the engine enough to take tension off the mount. Then, it's merely a matter of removing and replacing the broken engine mount and torquing the retaining bolts to specification according to the repair manual. Lower the engine back down, making sure the mount settles correctly and isn't twisting or binding.

Cost of Replacing a Bad Engine Mount
Drivers often gain interest in changing their engine mounts after getting a quote from a repair shop. Repair shops may charge as little as $100 or as much as $1,000 to replace a bad motor mount, depending on the type of car. Most cars have two or three motor mounts and a transmission mount. High-performance cars and luxury vehicles may have as many as five mounting points to control vibration and engine torque. It's a good practice to replace motor mounts together; however, it's not always mandatory.
The average cost of a motor mount is between $35 and $200. Labor cost the repair shop charges can easily exceed $300 as some of them may take quite some time to replace. Most modern vehicles are more challenging to replace engine mounts because their location is often hard to reach without removing significant components.
Frequently Asked Questions (FAQ)
Can I drive with broken engine mounts?
It's possible, but not recommended. Driving with broken engine mounts can cause significant damage to your engine, exhaust, and other components. It also affects performance and can lead to safety concerns due to excessive engine movement.
How long can engine mounts last?
Engine mounts typically last between 5 to 7 years, depending on driving conditions and the type of vehicle. Frequent stop-and-go driving or harsh driving conditions can shorten their lifespan.
What are the signs of bad engine mounts?
Common signs include excessive vibration, clunking noises during acceleration or deceleration, misaligned engine components, and unusual engine movement under load.
How much does it cost to replace engine mounts?
Replacing engine mounts can cost anywhere from $100 to $1,000 depending on the vehicle type and labor costs. DIY enthusiasts can save on labor, with motor mounts themselves ranging from $35 to $200.
Is it a DIY-friendly job to replace engine mounts?
Yes, replacing engine mounts can be a DIY project for those with basic mechanical knowledge. With the right tools, jack stands, and a repair manual, many home mechanics can tackle this job in their driveway.
Driving with Broken Engine Mounts — Should You Do It?
Driving with bad engine mounts? Sure, it can be done—but it’s definitely not something you want to push your luck with. It’s not just about comfort; it’s about safety and avoiding further damage to your vehicle. The vibrations and banging noises you hear when accelerating are your car's way of saying, "Hey, something's wrong!" Ignoring these signs could result in damage to other vital components, like your exhaust system, cooling lines, or even your transmission. If your car doesn't feel as smooth as it used to, or you notice unusual noises under the hood, it's time to check those engine mounts.
If you're not experienced in diagnosing or replacing engine mounts, a high-quality service and repair manual will be your best friend. It breaks down the entire procedure, shows you the exact location of the mounts, and gives you the confidence to tackle the job yourself. The good news? Replacing engine mounts is a pretty straightforward DIY task for anyone with basic mechanical skills. With the right tools, a little patience, and a solid manual in hand, you can safely replace a failing or broken engine mount at home. Just remember to follow the correct procedure and basic safety precautions, and your car will be back to running smoothly in no time!
