Proper winter motorcycle storage is crucial to protect your bike during cold months and ensure it’s ready to ride come spring. Whether you live in a region with freezing temperatures, snow, or harsh weather, motorcycle winterization is essential to ensure your bike remains in top condition during the off-season. Without it, you could face costly repairs come spring.
In this ultimate guide, we’re going to walk you through how to store a motorcycle in winter and cover best practices for winter motorcycle storage. Whether you’re new to bikes or a seasoned rider, this guide will help you prepare your bike properly, avoiding issues like rusted tanks, flat batteries, or even damaged engines.
We’ll cover all the essentials, from choosing the best place to store your motorcycle and cleaning key components to using fuel stabilizers and protecting your battery. By following this step-by-step guide, you can be confident that your bike will survive the winter unscathed, and when spring arrives, you’ll be ready to ride without a hitch.
Let’s dive in and ensure your motorcycle gets in top shape through winter.
Step 1 – Finding the Perfect Place to Store Your Motorcycle in Winter
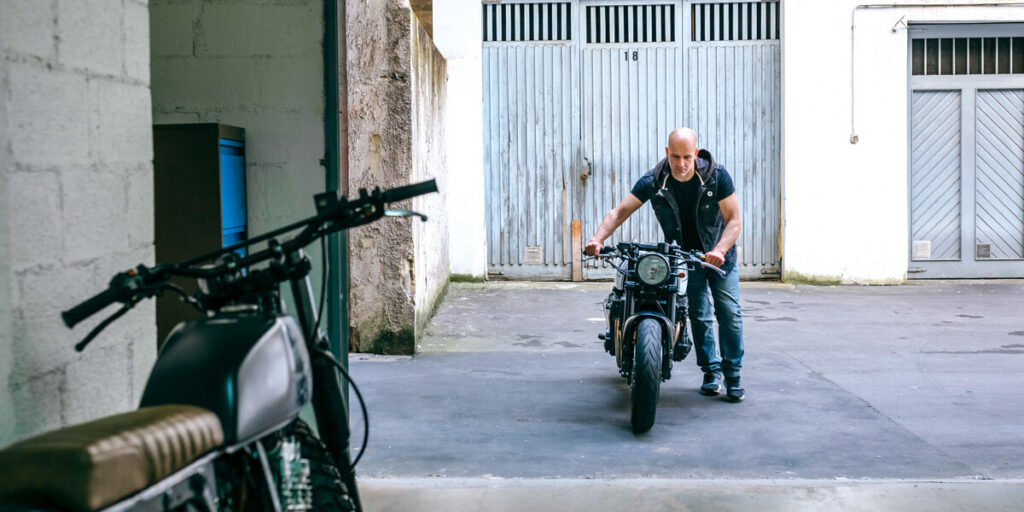
Where you store your motorcycle during winter is crucial, and this step-by-step motorcycle winterization guide will help you choose the best location to ensure your bike stays protected. The goal is to protect your bike from cold temperatures, moisture, and other elements that can lead to rust, corrosion, or even engine damage. Here’s what you need to know to choose the right storage location.
Indoor vs. Outdoor Storage
Indoor Storage: Whenever possible, store your motorcycle indoors in a garage or shed. Indoor storage shields your bike from the harsh elements like snow, rain, and freezing temperatures. A dry, well-ventilated area helps prevent moisture buildup, which can cause rust and damage to metal parts.
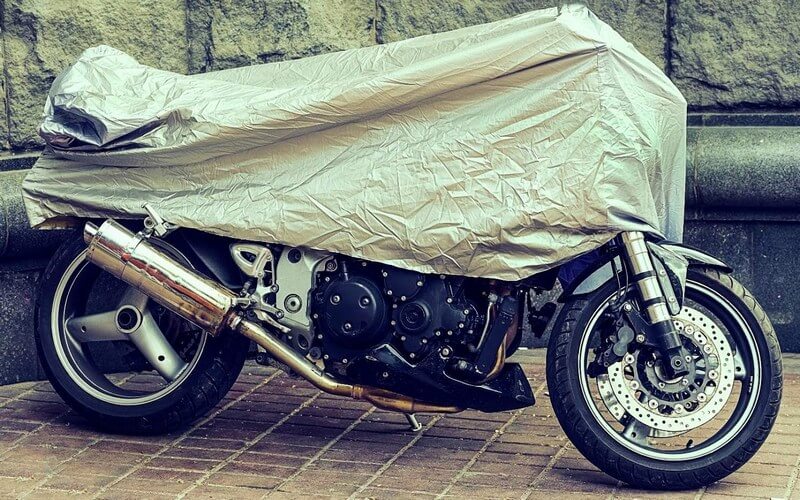
Outdoor Storage: If you have no choice but to store your bike outside, you’ll need to take extra precautions. Invest in a high-quality, weatherproof motorcycle cover that is both waterproof and breathable. This protects your bike from moisture while preventing condensation from getting trapped underneath the cover, which could lead to rust.
Key Considerations
- Climate-Controlled Storage: For the best protection, a climate-controlled unit keeps temperature and humidity stable, reducing the risk of moisture-related damage and frozen components.
- Sheltered Spots: If outdoors, choose a spot that offers some protection, like under a carport or beside a wall. This helps reduce exposure to rain and wind.
By choosing the right storage location, you’re giving your bike the best possible chance of staying in good condition through the winter months.
Step 2 – Cleaning and Detailing Your Motorcycle Before Winter Storage
Cleaning and detailing your motorcycle before storage is crucial for protecting your bike from damage during the winter months. Dirt, grime, and road salt that accumulate throughout the riding season can cause serious harm if left untreated. Corrosion, rust, and other damage can develop over time, especially when moisture is involved. Thus taking the time to clean and protect your bike now will save you from headaches and costly repairs down the line.

Washing Your Motorcycle
Start with a comprehensive wash to remove all dirt and grime. Use a gentle, bike-specific soap that won’t strip away protective coatings or wax. Pay extra attention to areas like the wheels, chain, and lower parts of the frame, where debris tends to build up. After washing, dry the bike completely with a microfiber towel to ensure no moisture remains. Leftover moisture can lead to rust or corrosion during storage, so make sure every part of the bike is bone dry.
Protecting Surfaces with Wax and Lubricants
Once the bike is clean and dry, apply a coat of wax to all painted surfaces. This step is essential because the wax forms a barrier that helps protect against moisture and oxidation. For metal components, a light coating of WD-40 or another clear coat protectant will help ward off rust. This is especially important for chrome or aluminum parts, which can deteriorate quickly if exposed to moisture during the winter.
The chain and cables also need attention. After cleaning the chain, apply a quality motorcycle chain lubricant to protect it throughout the months of inactivity. Lubricate the throttle, clutch, and brake cables as well. If these components aren’t properly maintained, they can seize up over time, leading to performance issues when you’re ready to ride again.
Leather and Seat Care
If your motorcycle has leather seats or accessories, don’t forget to treat them before storage. Leather can dry out and crack in cold weather if left untreated, so apply a leather conditioner to keep it supple. It’s also a good idea to remove any leather saddlebags or other accessories and store them indoors, where they’re protected from the elements.
Step 3 – Changing the Oil and Fluids Before Winter Hits
Changing your motorcycle’s oil and fluids before winter motorcycle storage ensures your engine and other components stay protected throughout the off-season. While it might seem tempting to skip this step if you’re not due for a change, letting used oil and other fluids sit in your bike over the winter can lead to corrosion and other problems. Fresh fluids will keep your motorcycle better protected from the inside out during the months it’s not in use.
Why Fresh Oil Matters
Motorcycle oil doesn’t just lubricate the engine; it also carries away contaminants like dirt, metal shavings, and combustion byproducts. Over time, these impurities build up in the oil, and when left stagnant in your engine, they can become corrosive. Used oil contains acids and moisture that, if left to sit, can start to damage the internal components of your engine, such as bearings, seals, and gaskets. Thus changing the oil before storage helps prevent these contaminants from causing harm.
When preparing your bike for winter, drain the old oil and replace it with fresh oil. Consider using a winter-grade oil, such as 5w-30, which will provide easier startup in cold weather when the riding season resumes. Along with changing the oil, don’t forget to replace the oil filter as well to ensure your engine has a completely clean slate for the winter months.

Changing Other Fluids
In addition to the engine oil, it’s important not to overlook other essential fluids like brake fluid, coolant, and transmission oil (if applicable). These fluids can also degrade over time, absorbing moisture and becoming less effective.
- Brake Fluid: Brake fluid is hygroscopic, meaning it absorbs moisture from the air. Over time, this moisture can reduce the effectiveness of the brakes and even cause internal corrosion within the brake system. If it’s been a while since you last changed your brake fluid, now is a good time to do so before storing your bike.
- Coolant: If your motorcycle is liquid-cooled, check the coolant level and condition. Coolant can also become acidic over time, which can lead to corrosion in the cooling system. Replacing the coolant before storage ensures that your cooling system is protected from freezing temperatures and internal damage during winter.
- Transmission and Primary Fluids: For motorcycles with a separate transmission or primary fluid, changing these fluids is also recommended before winter storage. Like oil, these fluids can collect contaminants and moisture, which can cause internal damage if left sitting in the system for too long.
Step 4 – Topping Off the Tank and Adding a Stabilizer
One of the most critical steps in winterizing your motorcycle is addressing the fuel in your tank. Letting untreated fuel sit for months can lead to a host of problems when you try to start your bike again in the spring.
Why Fuel Needs Special Attention
Gasoline isn’t meant to sit unused for long periods. Over time, it can break down and oxidize, forming gum and varnish that can clog up fuel lines, injectors, or carburetors. Modern gasoline also contains ethanol, which is particularly troublesome because it attracts moisture from the air. This moisture can separate from the fuel and settle at the bottom of the tank, leading to rust and corrosion in metal tanks and causing plastic tanks to degrade over time. Untreated fuel can create a sticky mess that could leave you facing expensive repairs come spring.
The Solution: Fuel Stabilizer
To prevent fuel breakdown and moisture accumulation, adding a fuel stabilizer to your gas tank is a must before storing your motorcycle. A good stabilizer, such as Sta-Bil or Sea Foam, works by preventing fuel oxidation and moisture absorption. This keeps the fuel fresh for several months, ensuring that your bike will start without trouble when the riding season returns.
Here’s how to properly treat your fuel:
- Fill the Tank: Before adding the stabilizer, fill your gas tank to the brim with fresh gasoline. A full tank minimizes the amount of air inside, which helps reduce the chance of condensation forming. Less air means less moisture, and that’s key to preventing rust inside the tank. If you’re storing your bike outdoors or in a humid environment, this step becomes even more crucial.
- Add Fuel Stabilizer: Once your tank is full, add the recommended amount of fuel stabilizer. Different products require different amounts, so follow the instructions on the stabilizer’s packaging. For example, Sta-Bil typically recommends 1 ounce of stabilizer for every 2.5 gallons of gasoline. Be sure to measure carefully—using too little can render the stabilizer ineffective, while too much won’t harm your engine but is unnecessary.
- Run the Engine: After adding the stabilizer, run your engine for a few minutes. This allows the treated fuel to circulate throughout the entire fuel system, including the injectors or carburetors. Letting the stabilizer reach these critical areas ensures that all fuel lines and components are protected from gumming up during storage.
Ethanol-Free Fuel: A Better Option?
If you can get ethanol-free gasoline, that’s even better. Ethanol-free fuel doesn’t attract moisture like regular gasoline with ethanol does, making it a safer choice for long-term storage. However, it’s not always easy to find, so adding a stabilizer to ethanol-blended fuel is often the more practical solution. If you can find a station that sells ethanol-free gas, it might be worth the extra effort for the added peace of mind during storage.
Step 5 – Keeping Your Motorcycle Battery Alive Through Winter
Batteries naturally lose their charge over time, especially when they sit unused for long periods. Fortunately, with a little foresight and the right equipment, you can learn how to winterize a motorcycle battery to ensure it stays healthy throughout the off-season.
Lead-Acid vs. Lithium-Ion Batteries
Before we dive into how to maintain your battery, it’s important to know what type of battery your motorcycle uses, as the approach will vary slightly.
| Lead-Acid Batteries | Lithium-Ion Batteries |
|---|---|
| These traditional batteries discharge faster than lithium-ion batteries, especially in cold weather. They require more frequent maintenance, as letting them sit for long periods without attention can significantly shorten their lifespan. | Lithium-ion batteries have a lower self-discharge rate than lead-acid batteries, making them better suited for long-term storage. However, they are sensitive to cold temperatures and need special care if stored in freezing conditions. |
Step-by-Step Battery Maintenance
Regardless of the type of battery your motorcycle uses, the following steps will help ensure it stays in good shape over the winter months.
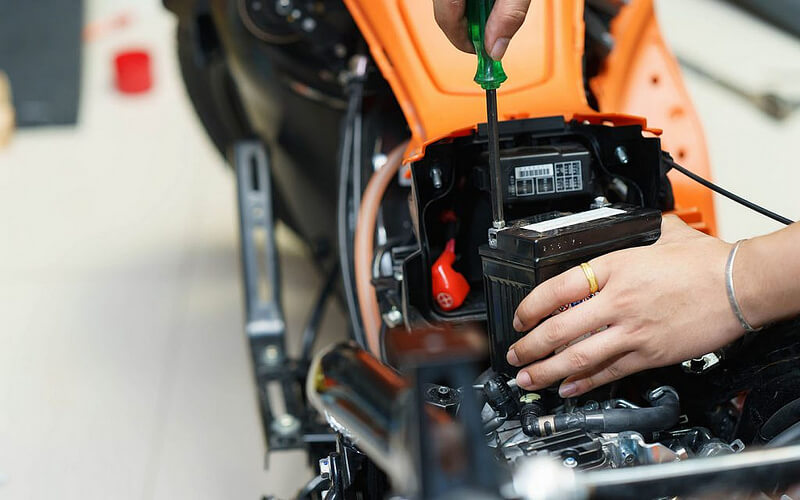
- Disconnect the Battery: Start by disconnecting your battery from the motorcycle. This helps prevent any slow drain that could occur from the bike’s electronics, even when the bike is off. If you have a lead-acid battery, be sure to remove it entirely from the bike if you’re storing your motorcycle outside or in an unheated area. Cold temperatures can accelerate the discharge rate, so it’s better to store the battery somewhere warmer, like inside your house or a heated garage.
- Clean the Battery Terminals: Before putting the battery away, take a moment to clean the terminals. Use a brush to remove any corrosion or grime that may have built up on the connectors. This ensures a good connection when you’re ready to hook it back up in the spring and can help prevent corrosion from worsening during storage.
- Use a Smart Charger or Battery Tender: One of the best ways to maintain your battery during winter storage is by using a smart charger, also known as a battery tender. These devices monitor your battery’s charge level and automatically supply a small, steady current when needed to keep the battery fully charged without overcharging it. Unlike older trickle chargers, which continuously apply current, smart chargers stop charging once the battery is fully charged, protecting it from damage.
- Store the Battery Properly: Whether your battery remains connected to a smart charger or is removed from the bike, it’s essential to store it in a cool, dry place. Avoid areas that experience extreme cold or heat, as temperature fluctuations can cause the battery to discharge more rapidly. Storing the battery off the ground is also recommended, as concrete floors can sap energy from lead-acid batteries over time (though this is less of a concern with modern batteries).
Pro Tip: Avoid the “Start Up” Myth
Many riders mistakenly believe that starting their bike periodically during winter storage is a good way to keep the battery charged. In reality, this can do more harm than good. When you start your motorcycle in cold weather and let it idle for a short time, it often doesn’t reach its optimal operating temperature. This can lead to condensation in the engine and exhaust, which, over time, can cause rust and other issues. It also doesn’t give the battery enough of a charge to make a real difference. Instead of risking damage, stick with a smart charger to maintain the battery’s health.
Step 6 – Protecting Your Tires for the Long Winter Ahead
When a motorcycle is stored for an extended period, especially in cold weather, the tires are prone to a number of potential issues. One of the most common problems is flat-spotting, which occurs when the bike’s weight presses down on one part of the tire for too long, causing that section to become flattened. Cold temperatures can also cause the rubber to harden, making flat spots more likely. On top of that, tire pressure can fluctuate with the changing temperature, leading to under-inflation, which further exacerbates the risk of flat spots and premature tire wear.
Luckily, you can protect your tires and ensure they’re in good condition by taking a few simple steps.
Inflating Your Tires
Before storing your bike for the winter, make sure to inflate your tires to the maximum recommended pressure as stated in your motorcycle’s owner’s manual or on the tire’s sidewall. Cold temperatures can cause air pressure to drop, so starting with fully inflated tires will help mitigate the effects of temperature-related deflation. Properly inflated tires are less likely to develop flat spots during storage, and they’ll be in better shape when you’re ready to ride again.
If you’re unsure of the correct tire pressure, it’s better to slightly overinflate rather than underinflate, as tires lose air over time. Be sure to check tire pressure periodically throughout the storage period to maintain the optimal pressure level.
Elevating the Motorcycle
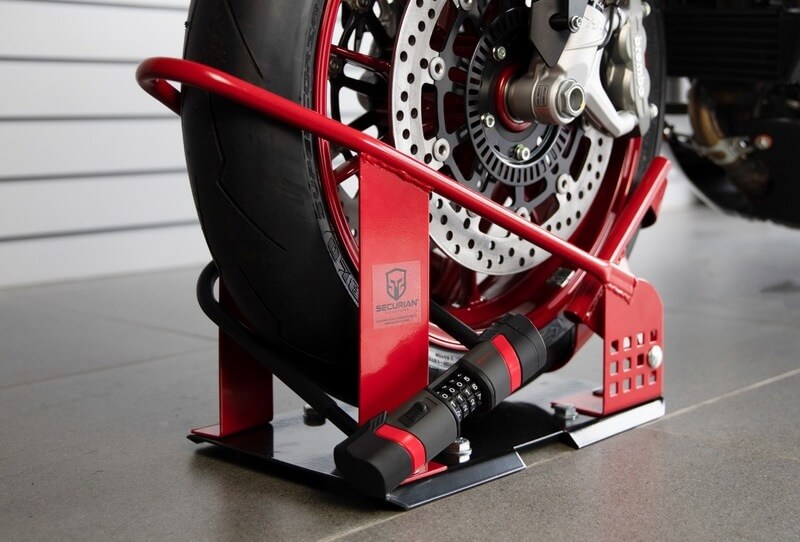
One of the best ways to protect your tires from flat-spotting is to elevate the motorcycle off the ground during storage. Paddock stands, center stands, or even a motorcycle lift can relieve the pressure on the tires, preventing them from bearing the full weight of the bike for months on end.
If you don’t have access to stands or lifts, you can still take steps to minimize flat spots by periodically rolling the bike forward or backward to change the position of the tires on the ground. Doing this every few weeks can help distribute the weight more evenly and reduce the likelihood of flat spots.
Protecting Tires from the Elements (Outdoor Storage)
If your motorcycle is stored outdoors or in an area that isn’t climate-controlled, your tires are exposed to temperature fluctuations and moisture, which can degrade the rubber over time. Even in a covered or sheltered space, tires can absorb moisture from the ground, which can lead to cracking and dry rot.
To help protect your tires, consider placing a barrier between them and the ground, such as a piece of plywood, carpeting, or rubber mats. This helps insulate the tires from cold, damp surfaces, preventing moisture from seeping into the rubber and causing damage.
In addition, make sure that your bike is covered to protect the tires from UV exposure, which can dry out and weaken the rubber. A quality motorcycle cover will shield the entire bike, including the tires, from direct sunlight and moisture, helping to preserve their integrity during the winter months.
Inspecting Tires Before Storage
Before you store your motorcycle, thoroughly inspect the tires for any signs of wear, damage, or aging. Look for cracks in the rubber, worn tread, or bulges that could indicate internal damage. If your tires are close to the end of their life, consider replacing them before storage so that your bike is ready to go when spring arrives.
Additionally, check the manufacturing date on the sidewall of each tire. Motorcycle tires typically have a lifespan of around five years, regardless of how much tread remains. If your tires are approaching or exceeding that age, it may be time to replace them, even if they look fine on the surface.
Step 7 – Sealing Up the Exhaust and Airbox to Keep Critters Out
When storing your motorcycle for the winter, one of the most overlooked yet critical steps is protecting your exhaust and airbox. These components are exposed areas of your bike that can be infiltrated by moisture and pests during storage. If moisture gets into your exhaust, it can cause internal rust and corrosion, which may not only reduce the lifespan of your exhaust but also lead to performance issues. Likewise, the airbox is a critical part of the engine’s air intake system, and if it’s blocked or contaminated, it can affect your bike’s ability to start and run smoothly when you bring it out of storage.
Another significant risk is that small animals, such as mice or squirrels, may seek shelter in your motorcycle’s exhaust or airbox during winter. They can build nests, chew wires, or block airflow, leading to costly repairs or potentially dangerous situations when you start your bike again.
Protecting the Exhaust
To prevent moisture and pests from getting into your exhaust, it’s essential to seal it properly before putting your bike into storage. Here are a few effective methods:
- Exhaust Plugs: One of the best options for protecting your exhaust pipes is using exhaust plugs. These are rubber or silicone plugs that are designed to fit snugly into the opening of your exhaust. They form a tight seal that keeps moisture, dirt, and pests out while allowing air to escape if necessary. Exhaust plugs are easy to install and remove, and they come in different sizes to fit various exhaust types.
- Plastic Bags and Rubber Bands: If you don’t have exhaust plugs on hand, a simple alternative is to cover the exhaust opening with a plastic bag and secure it tightly with a rubber band. While this method isn’t as durable or secure as using an exhaust plug, it can still provide a reasonable level of protection against moisture and pests. Just be sure to check the seal periodically to ensure the bag hasn’t come loose during storage.
- Steel Wool: Some riders insert a small amount of steel wool into the exhaust pipe before sealing it for an added layer of protection against rodents. Rodents are less likely to chew through steel wool, making it an effective deterrent. Just be sure to remove the steel wool (and any other blockages) before starting your bike in the spring, as it can cause significant damage if left inside the exhaust when the engine is running.
Protecting the Airbox
Like the exhaust, the airbox needs to be sealed to prevent moisture and debris from entering. The airbox is the first point of contact for the air that enters your engine, so keeping it clean and free of contaminants is essential for your bike’s performance.
- Cover the Airbox Inlets: If your airbox has exposed inlets, cover them with a plastic bag, tape, or a fitted cover designed for your bike model. This will prevent moisture and dust from entering the air intake system during storage. Ensure the cover is secure but easy to remove when it’s time to ride again.
- Inspect for Openings: Some motorcycles have airboxes that are harder to access or may not have easily identifiable openings. In these cases, take the time to inspect your airbox for any gaps or entry points where dirt or pests could get in. Sealing these areas with tape or plugs can help protect the internal components of your bike’s intake system.
Dealing with Critters
One of the biggest concerns when storing your bike, especially in outdoor or less secure areas, is the risk of rodents entering your exhaust or airbox. These small animals can cause a surprising amount of damage in a short period, from chewing through wiring to nesting in your engine components.
To minimize the risk of critters taking up residence in your motorcycle during the winter, consider the following tips:
- Place Traps or Repellents: Place rodent traps or natural repellents like mothballs or peppermint oil near your bike. These can help deter small animals from approaching your motorcycle in search of warmth and shelter.
- Check the Storage Area: Before winter arrives, inspect the area where you’ll be storing your bike for any signs of rodent activity. Look for droppings, nests, or gnawed materials, and take steps to rodent-proof the space by sealing off entry points and keeping the area clean.
- Regular Inspections: Even during storage, it’s a good idea to check on your bike periodically to ensure that no critters have breached your defenses. Look for any signs of nesting or debris inside the exhaust or around the airbox, and reapply repellents if necessary.
Remember to Remove Plugs and Covers
It’s crucial to remember to remove any exhaust plugs, steel wool, or airbox covers before you start your motorcycle again in the spring. Failing to do so can lead to serious damage to your exhaust system or engine. Keep a checklist of all the protective measures you’ve taken during winterization so that when the time comes to get your bike ready for riding, you don’t forget any critical steps.
Step 8 – Covering Your Motorcycle Right for Winter
Your motorcycle’s surfaces—paint, metal, rubber, and plastic—are all vulnerable to the elements, even during storage. Even indoors, dust can accumulate in hard-to-reach places, causing scratches or interfering with mechanical components when you start the bike up again. Outdoors, exposure to moisture, temperature fluctuations, and UV rays can lead to rust, paint fading, and damage to seals and tires.
A proper cover is your motorcycle’s first line of defense, protecting it from these environmental factors and helping maintain its appearance and performance through the winter months.
Choosing the Right Cover
Not all covers are created equal, so it’s important to choose one that is designed for motorcycles and offers the features needed to protect your bike through the winter. Here’s what to look for in a quality cover:
- Material: Choose a cover made from a durable, weather-resistant material, such as polyester or heavy-duty nylon. For outdoor storage, look for covers with a waterproof coating that will keep rain and snow off your bike. For indoor storage, a softer material that’s gentle on paint and finishes is ideal.
- Breathability: A breathable cover is essential for preventing moisture buildup underneath. Temperature fluctuations can cause condensation on your bike, even if it’s stored in a garage. Breathable covers allow moisture to escape, reducing the risk of rust, mold, or mildew forming on your bike’s surfaces.
- UV Protection: Prolonged exposure to sunlight can fade paint, crack rubber, and deteriorate plastic components. Even in outdoor storage, UV rays can be an issue. Look for a cover with UV protection to shield your bike from the sun’s harmful effects.
- Proper Fit: A cover that fits your motorcycle snugly is key to effective protection. A loose or ill-fitting cover can flap in the wind, allowing dust, dirt, and moisture to sneak in underneath. It can also cause scratches as it moves against the paint. Many covers are designed to fit specific makes and models, but universal covers with adjustable straps can also be a good option if they fit securely.
Securing Your Cover
Once you’ve chosen the right cover, it’s important to make sure it’s secured properly. If your bike is stored outdoors, an unsecured cover can be blown off by strong winds, leaving your bike exposed. Many outdoor covers come with adjustable straps or drawstrings that can be tightened around the base of the bike to keep the cover in place. In particularly windy areas, consider adding extra tie-downs or bungee cords to ensure the cover stays secure.
If storing your motorcycle indoors, you won’t need to worry about wind, but it’s still a good idea to secure the cover to prevent it from shifting or slipping off. A well-secured cover will keep dust and debris out while also preventing any accidental contact with nearby objects that could cause scratches or dents.
Frequently Asked Questions (FAQ)
Do I really need to winterize my motorcycle if I’m only storing it for a couple of months?
Yes, winterizing your motorcycle is important, even if you’re only storing it for a short period. Gasoline can start to degrade within a month, leading to potential issues with your fuel system. Additionally, your battery can begin to discharge, and moisture can cause rust if left unchecked. Proper winterization ensures your bike remains in good condition and saves you from dealing with avoidable problems when you’re ready to ride again.
How Often Should I Start My Motorcycle in the Winter?
You actually shouldn’t start your motorcycle during winter storage unless you’re going to take it for a full ride. Simply idling the bike for a few minutes doesn’t allow the engine to reach its optimal temperature, which can cause condensation to form in the engine and exhaust system, leading to rust and other issues. Instead, use a smart charger to maintain the battery and avoid the temptation to start the engine unless you’re going for a substantial ride that heats the bike up completely.
How do you winterize a motorcycle with a carburetor vs. fuel injection?
The primary difference between winterizing a motorcycle with a carburetor and one with fuel injection lies in fuel management. For carbureted bikes, it’s important to drain the carburetors to prevent the fuel from gumming up the jets and needles over the winter. You can do this by running the engine with the fuel supply turned off until it stalls or by manually draining the carburetor bowls. Fuel-injected bikes, on the other hand, do not require this extra step. You can simply add a fuel stabilizer to the gas tank and run the engine for a few minutes to allow the treated fuel to circulate through the system.
Can I store my motorcycle outside with just a cover, or do I need to bring it indoors?
You can store your motorcycle outside with a good-quality cover, but there are extra precautions to take. An outdoor cover should be waterproof, UV-resistant, and breathable to prevent moisture buildup and sun damage. If possible, choose a sheltered location, like under a carport, to provide additional protection from wind and snow. However, indoor storage is always preferable, especially in colder climates, as it offers better protection from the elements.
How often should I check on my motorcycle during winter storage?
It’s a good idea to check on your bike about once a month during winter motorcycle storage to ensure everything remains in good condition. This allows you to inspect for any signs of moisture, check tire pressure, ensure the cover is still secure, and ensure no pests have infiltrated the exhaust or airbox. If your bike is stored outdoors, more frequent checks might be necessary, particularly after severe weather.
Should I drain the gas tank before storing my bike for winter?
It’s generally better to fill the gas tank and add a fuel stabilizer rather than drain it. A full tank minimizes the amount of air in the tank, reducing the risk of condensation and rust. Draining the tank can leave exposed metal surfaces vulnerable to corrosion. By filling the tank with fresh fuel and using a stabilizer, you help prevent fuel degradation and protect the entire fuel system during storage.
Can I ride my motorcycle in winter?
Yes, you can ride a motorcycle in winter, but it comes with added risks and challenges. Cold weather affects tire grip, and roads can become slippery due to ice, snow, and road salt. If you decide to ride during winter, make sure to use proper winter gear to stay warm and visible, check your tire pressure frequently, and be cautious of road conditions. That being said, riding in winter is generally not recommended for safety reasons, especially in severe weather conditions.
How to de-winterize a motorcycle?
To de-winterize your motorcycle, start by reversing the steps you took during winterization. Remove any plugs or covers from the exhaust and airbox, reconnect the battery if it was disconnected, and check your tire pressure. Inspect the oil and fluids to ensure they’re in good condition, and top off any low levels. Give your bike a thorough inspection, paying close attention to the chain, brakes, and lights. Once everything checks out, take the bike for a short ride to make sure it’s running smoothly before you hit the road for longer journeys.
Should You Winterize Your Motorcycle?
Absolutely. Motorcycle winterization isn’t just about preventing damage—it’s about ensuring that your bike stays in peak condition and is ready to hit the road as soon as the warmer weather returns. Neglecting proper storage can lead to rust, a dead battery, fuel issues, and expensive repairs that could easily have been avoided. By taking the time to winterize your bike, you’re protecting your investment and saving yourself the hassle of dealing with preventable problems in the spring.
So, whether you’re storing your bike indoors or outdoors for a couple of months or an entire season, the steps outlined here will help preserve its condition and performance. Winterizing your motorcycle is essential if you want to keep your bike running smoothly for years to come.
Just don’t forget — winter may be tough, but with the right preparation, your motorcycle will be ready to roar back to life as soon as the snow melts.