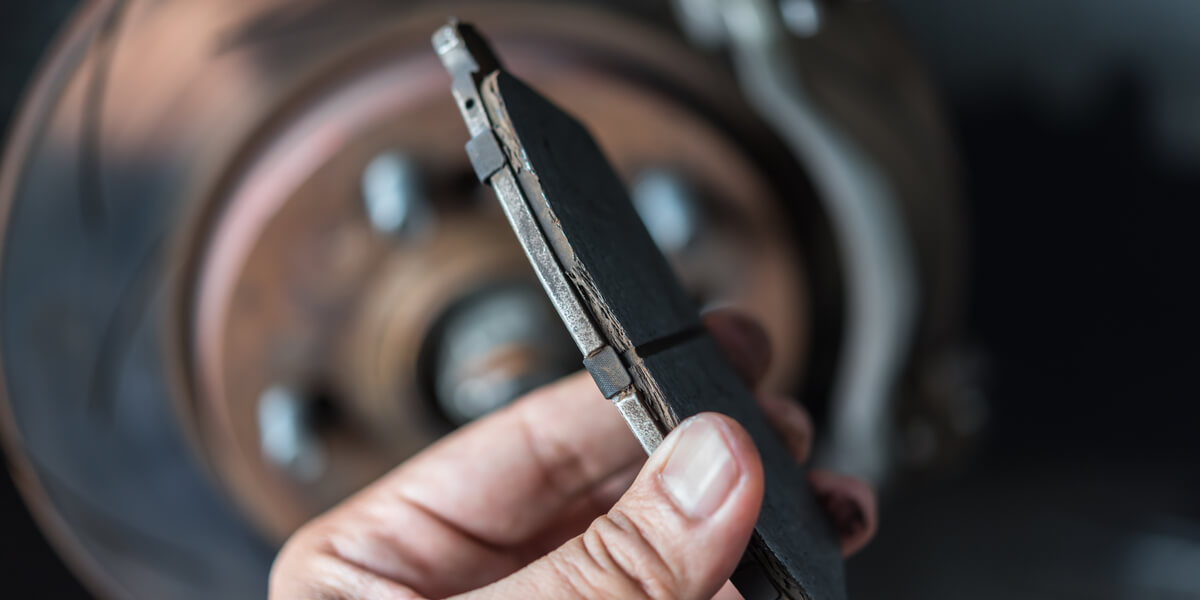
Everything you need to know regarding brake pads replacement cost!
Everyone should know how to replace brake pads on their car. Even though working on your brakes yourself might seem daunting at first, replacing brake pads is actually quite an easy job. Even better, you can also save a lot of money by changing your brake pads over the cost of taking your car to a shop. And if you don't know how, worry not — it's super easy to learn — and we are here for that!
So without further ado, here's all you need to know about brake pads, how to replace them, and the different costs associated with brake maintenance and repairs.
What Are Brake Pads?
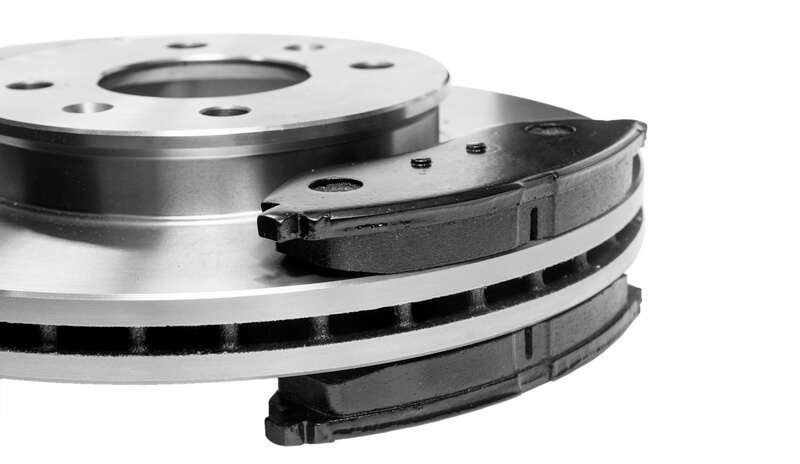
Most modern vehicles today use disc brakes. Disc brake systems work by pressing a stopping material, called the pad, against the rotor. The friction from the pad and rotor pressing together stops the car. Older cars and many trucks use drum brakes, which work similarly, but press against the inside of a drum rather than onto a disc.
And why do recent cars use disc brakes over drums? Let's just say that disc brake systems are usually simpler, more efficient, and cheaper to maintain. Obviously, there are exceptions, but most of the time, it's a fact.
Different types of brake pad materials
There are several common materials brake pads are made of, each with certain properties and their own set of advantages and drawbacks. The most common brake pad materials are:
-
Non-Asbestos Organic
-
Semi-Metallic
-
Ceramic
Before 1970, asbestos was common in brake linings and transmission clutches. Asbestos transfers heat exceptionally well and is long-wearing, but the risks of cancer caused by breathing asbestos dust prevent its use today.
Non-Asbestos Organic
Brake pads made from organic sources use fibers from different types of plants, held together with glue and set under pressure. Each manufacturer has their own proprietary blend that is not often public. Organic brake pads are inexpensive, but they do not provide the best stopping power or lifespan. Organic brake pads can contain up to 20% metal in the mixture.
Semi-Metallic
As the name implies, this type of brake pad uses a combination of metals like brass, nickel, copper, and other metals. Semi-metallic pads provide better stopping power than organic pads and less brake dust, but can also be noisy. The composition of metal with organics and glue creates a hard, long-wearing pad at the expense of the rotor.
However, the main drawback with semi-metallic brake pads is that, when they wear out, the dust they make is also metallic, which tends to leave a rusty deposit on wheels. It's not so much a problem if you drive an old junk with steel wheels but, if you own a sports car with expensive mag wheels, you might want to consider the next type of pads.
Ceramic
Ceramic pads are made from copper and ceramic fibers pressed together. Ceramic pads provide excellent stopping power, heat dissipation, and a massive reduction of dust. Ceramic pads are also very quiet.
The only real inconvenience to buying ceramic brake pads is the higher cost. On the other hand, taking into account that you don't drive with the pedal to the floor non-stop, ceramic brake pads also usually last longer, ultimately reducing the maintenance cost.
How Much Do Brake Pads Cost?
As with any other car part, the average replacement cost will depend on the model, year, type, size, quality, and manufacturer. To better be able to demonstrate the average brake pad replacement cost, we will look at the three different vehicles — a 2012 Honda Civic, a 2015 Mercedes-Benz C300, and a 1992 Ford F-150 — put them in different scenarios and see what happens.
2012 Honda Civic
The 2012 Civic uses factory put ceramic brakes on the front and rear, so, ideally, that is the material you should search for. In fact, finding organic pads would even be a challenge.
A set of Raybestos Element3 ceramic front brake pads will cost as little as $17.35. The rear pads are available at the same cost. A set does both front or both rear wheels.
Of course, whenever replacing brake pads, you should also look to replace the discs. It's not always mandatory but using old rotors with new brake pads is, almost 99% of the time, a bad idea. With that being said, the average cost to replace disc brakes also comes with its own set of challenges, so we'll keep that for another post.
2015 Mercedes-Benz C300
Another vehicle that boasts factory ceramic brakes, the Mercedes-Benz C-Class should also receive ceramic replacements. The pads for these high-end cars include wear sensors, which drives the cost up slightly. A set of Power Stop front ceramic pads will only set you back $48.79 — $37.79 more for matching rear pads. Not too bad for a premium car.
1992 Ford F-150
Back in the early 1990s, semi-metallic brakes were common, but many cars and trucks continued to have factory-installed organic brake pads to cut costs. Also, since metallic pads usually last longer and are able to better withstand extreme heat, it's not uncommon for workhorses and commercial vehicles to use semi-metallic models.
This older truck provides a good example of the difference in cost depending on the types of brake pads. Surprisingly, organic pads are still available for the F-150, and at the cost of $5.44 for the front brakes, they can be a tempting choice despite the drawbacks. A set of factory-replacement semi-metallic pads from Raybestos are only going to put an $8.25 dent in your pocket. You can buy top-quality Power Stop carbon-fiber ceramic pads for this truck for only $41.79.
Other Costs Related to Replacing Brake Pads
When your brake pads wear, the brake disc also wears. You can see grooves, like an old vinyl record, from the friction of the brake pad on the rotor. As mentioned before, when replacing your car's brake pads, you should also replace the rotors.
If you are really on a tight budget, you should at least have your rotors turned. Turning a rotor is a machining process that skims a small amount of material off the rotor until the surface is smooth and flat. However, each rotor has a minimum thickness, at which point it can't be machined anymore and must be replaced. Also, many modern vehicles use very thin rotors to reduce weight and noise, but these vehicles frequently require rotor replacement along with pads. Rotors can usually be turned at your local auto parts store for about $15.
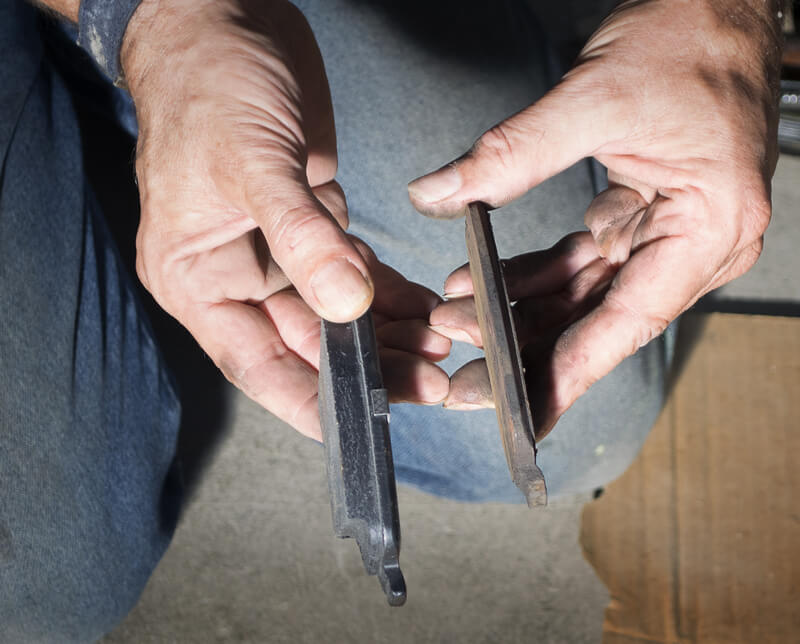 New pad VS. old pad
How Do You Know When it's Time To Replace Brake Pads?
Manufacturers include a small metal pin on the side of a brake pad. This pin will drag against the rotor when the pad has worn beyond its service life. When that happens, you will hear a high-pitch noise like nails on a chalkboard every time you use your brakes. Don't delay when you start hearing the squeal. The longer you wait, the more damage you are doing to your rotors.
Find a repair manual for your car here!
Inspecting and Replacing Disc Brake Pads
Catching your brake pads from wearing all the way out will prevent damage to your rotors. It also keeps your car from making that embarrassing squealing sound every time you hit the brakes. And, luckily, inspecting your brakes is easy, and it gives you an opportunity to check on other parts of your car while you're at it.
Safety First
You will need to jack your car up and support it properly on jack stands. It's not safe to work under a car that is only held up by a floor jack. Use high-quality stands and place them on appropriate support members. You can find the jacking points for your car in your repair manual. Before you do any work under your car, make sure you can jack it up and support it safely.
Step One: Remove the Wheels
The lug nuts are easier to loosen when the car is on the ground unless you are using air-powered tools. Don't remove the lug nuts all the way; just make sure you can get them off once the car is in the air. Jack the car up sufficiently so that the tires are free from the ground and support the car on stands. Remove the lug nuts and set the tire aside.
Tip: For extra safety, slide the wheels under the car. If a stand falls, the wheel may prevent a fatal injury.
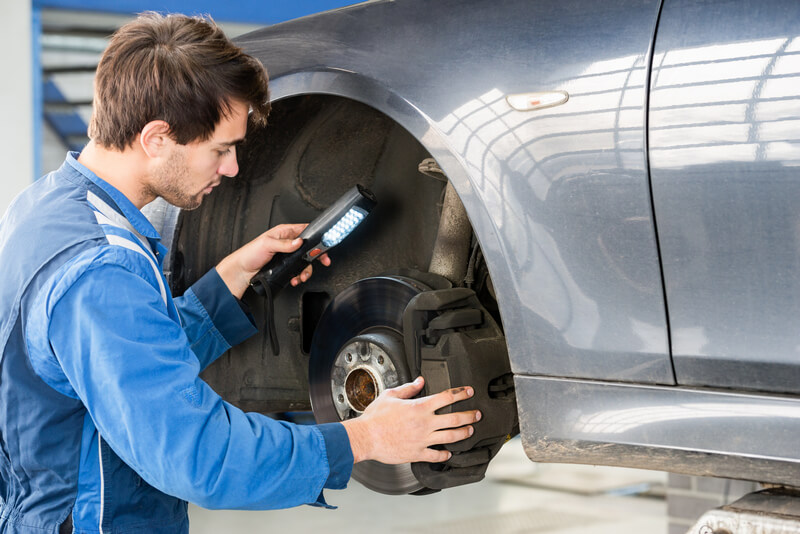
Step Two: Inspect the Caliper and Pad
The caliper mounts to the knuckle so that it floats over the rotor. The pads are balanced within the caliper. Through a hole in the caliper or looking on the side, you can see the thickness of the disc brake pads. The distance between the rotor and the wear pin will give you an idea of how much life is left in your pads. Anything less than ⅛" should be replaced.
While inspecting the caliper and pad, look for signs of leakage. There should not be any brake fluid on or around the caliper or rotor.
You can also see the condition of the rotor at this point. The rotor should be fairly smooth. Deep grooves, cracks, rust, or dark spots that look burned indicate a problem with the rotor.
Step 3: Removing and Replacing Pads
The caliper is bolted to the steering arm, typically with two bolts. Once these bolts are removed, lift the caliper free of the rotor. Severely worn rotors may hang up on the pads. Use a screwdriver to gently press against the pad until the caliper is free.
Do not allow the caliper to hang from the brake hose. This can cause damage to the hose that isn't apparent until under pressure. Instead, use a coat hanger to suspend the caliper from the suspension or bodywork.
The pad is a metal backing with friction material glued to it. Once the caliper is free, the pad can be lifted out. Beneath the pad, you will see the caliper piston. Look for signs of brake fluid, rust, or other issues. One common sign of a caliper problem is pistons that are stuck. If any of these issues are apparent, you will need to rebuild or replace the caliper.
Step 4: Cleaning
For brake pads to work correctly, they need to be able to slide properly; the same thing is also true for the calipers. Disassemble the pads holder and clean the surfaces in contact with the pads using a metal brush thoroughly. Make sure its exempt from rust and dirt. Once done, do the same for the caliper slider pins.
Don't forget to apply hi-temp grease onto the slider pins and sliding surfaces.
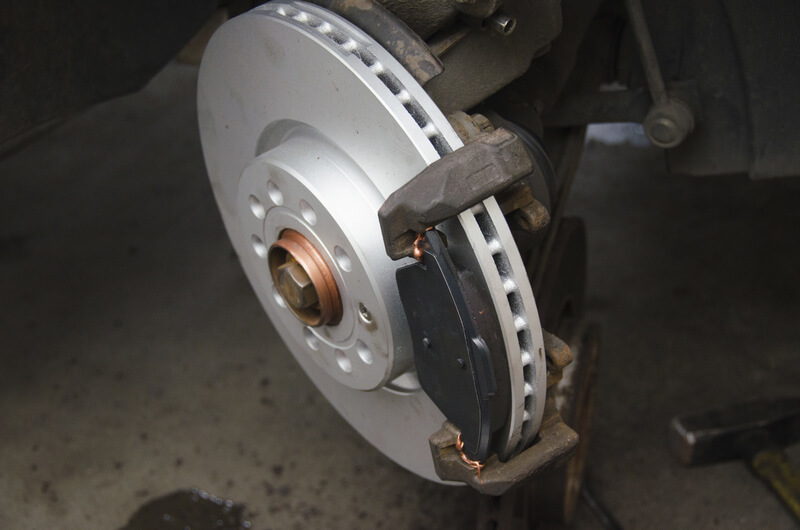 New pads and new rotors
Step 5: Fitting the Pad to the Caliper
Install the new pads into the holders. Use a dab of silicone brake grease on the backing plate only. The grease keeps the piston from making noise when the pad is pressed.
In order to put the calipers back on, it's usually necessary to retract the caliper pistons. This can be done with a special tool or a set of large pliers. Once fully retracted, fit the caliper over the rotor. Put the two retaining bolts back in and torque them to specs.
Replace the wheel and torque the lug nuts in a staggered pattern to specification.
Don't forget to inspect the brake fluid level once the car is back on four wheels.
Notes on Pad Replacement
I repeat it again: when replacing pads, always have the rotors measured and turned or replaced. Irregularities in the rotor can cause a host of braking problems, including sub-par performance, noise, vibration, and excessive wear.
Last Words
Replacing brake pads is definitely an easy job and, if you are still a beginner, this is a perfect job to start. Furthermore, by doing this job yourself, you will save hundreds over taking your car to a shop. Plus, you will have the satisfaction of doing the job yourself.
In all cases, it's important to mention that, when in doubt, always make sure to get your hands on your car's repair manual first. If you are unsure of the right procedure to follow (recent cars with ABS and advanced driver assistance system have specific procedures), your best bet is always to follow the manufacturer's recommended procedure.
With that being said, good luck and don't hesitate to ask questions in the comment section below
