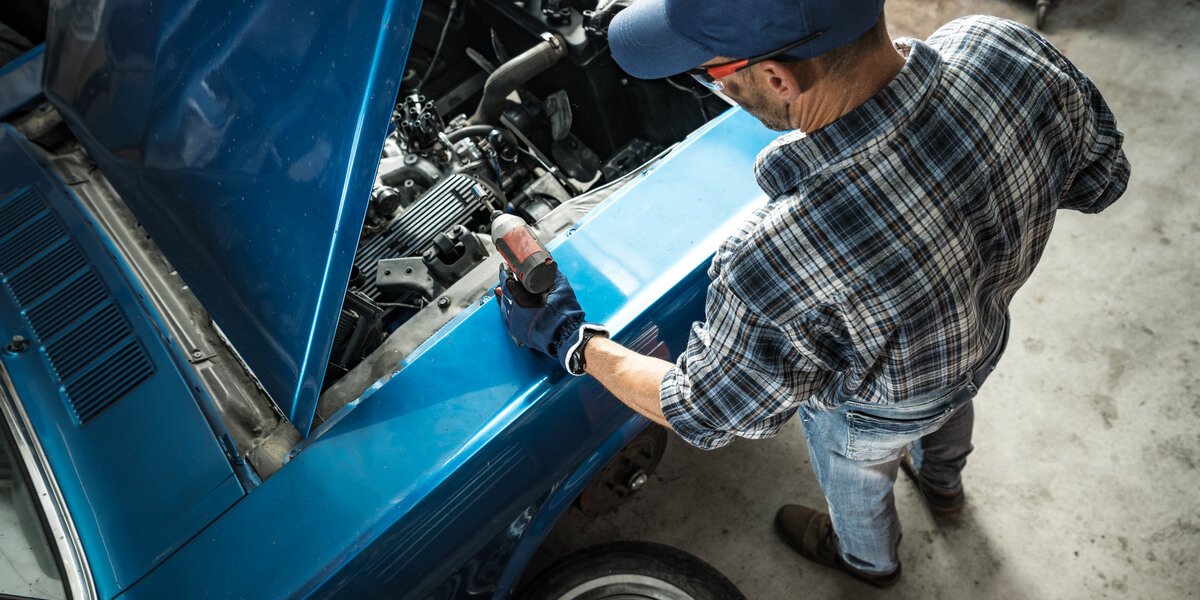
Owning a car means maintenance is inevitable—but that doesn’t always mean a trip to the mechanic. After all, why pay a mechanic for tasks you can handle yourself, right? From replacing brake fluid to cleaning your intake valves, there are high-value DIY jobs that don’t require a ton of experience, and they’ll save you hundreds, if not thousands, over time. The best part? You can do it with just a few tools, the right repair manual, and the willingness to get your hands a little dirty.
In this guide, we’ll cover five maintenance tasks that deliver the most bang for your buck. By the time we’re done, you’ll not only understand how to perform these tasks, but you’ll also be wondering why you ever paid a mechanic to do them in the first place.
Ready to roll up your sleeves? Let’s dive in.
1. Replacing Brake Fluid
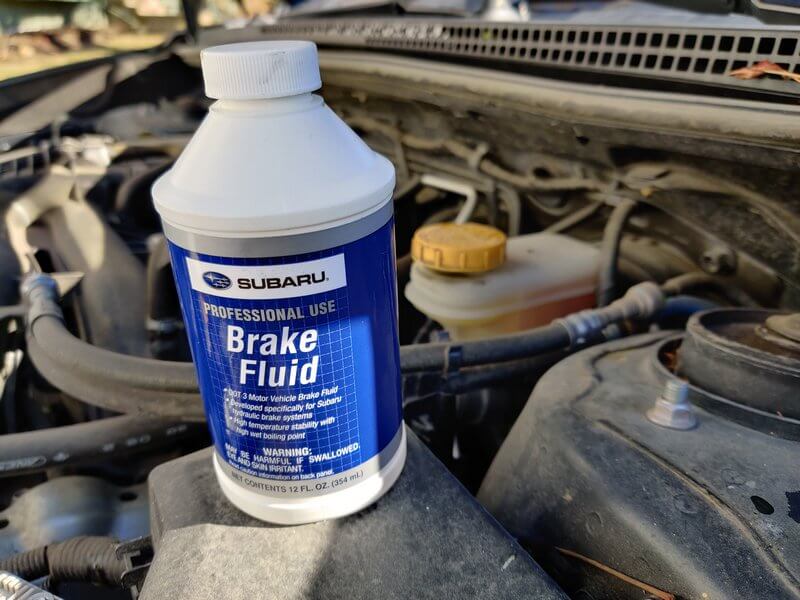
Brake fluid is crucial to your car’s braking system. It transfers force from the brake pedal to the calipers, allowing the brake pads to slow your car down. But over time, brake fluid absorbs moisture from the air, which can lead to corrosion in the system and degrade performance. If left unchecked, this can eventually cause brake failure. That’s why it’s recommended to replace your brake fluid every two to three years, depending on your vehicle and driving conditions.
Fresh brake fluid prevents corrosion, extends the life of your brake components, and ensures maximum stopping power—all while saving you from expensive brake repairs down the road.
Now, replacing brake fluid might seem tricky, but it’s actually a straightforward task you can handle at home with the right tools and a good repair manual. Let’s walk through the process step by step.

Tools & Materials You’ll Need
- A repair manual for your specific vehicle
- Brake fluid (use the type recommended in your manual)
- Wrench or brake bleeder wrench
- Clear hose and container for old fluid
- Vacuum brake bleeder (optional but makes the job easier)
- Gloves and safety goggles
Step-by-Step Instructions
- Locate the Brake Fluid Reservoir
Pop the hood and find the brake fluid reservoir — usually a small, clear container near the back of the engine bay on the driver’s side. Your repair manual will show you the exact location if you’re unsure. - Open the Brake Fluid Reservoir
Before you start, open the reservoir and top it off with fresh brake fluid. This prevents air from entering the system while you’re draining the old fluid. - Prepare the Brake Bleeders
Each wheel has a brake bleeder screw, usually near the brake caliper. You’ll open these to drain the old fluid. If you have a vacuum bleeder, it will make this process quicker and more efficient by pulling the old fluid out while replacing it with fresh fluid.
If you're using a vacuum bleeder, place a can of new brake fluid upside down in the reservoir. This lets the system refill automatically as the old fluid drains out. Start with the wheel farthest from the reservoir (typically the rear passenger side), and once the fluid runs clear, tighten the bleeder and move on to the next wheel, working closer to the reservoir.
No vacuum bleeder? No problem! Loosen the bleeder screw on the wheel farthest from the reservoir and let the old fluid drain into a pan. It’ll take a bit longer — around 5-10 minutes per wheel — but once the fluid turns clear, tighten the screw and move to the next wheel. Repeat this process for all four wheels.
- Top Off the Reservoir
Once the old fluid is replaced, top off the brake fluid reservoir one last time to ensure it’s at the correct level, then close the cap securely. - Test the Brakes
Pump the brake pedal a few times to make sure the brakes feel firm and responsive. If they feel spongy, it could mean air has entered the system, so you may need to bleed the brakes as outlined in your repair manual.
✱ Pro Tip: Brake fluid is highly corrosive, and any spills left unattended can ruin your car’s paint or damage plastic components in the engine bay. Always keep a rag or towel handy when you’re working with brake fluid, and immediately wipe away any drips or spills. You’ll also want to thoroughly clean the area with water or a brake cleaner spray afterward to neutralize any leftover fluid. This small step could save you from some costly paint or part repairs.
Why This Task Is Worth It
Replacing your brake fluid at home can save you significant money, as brake service at a shop can cost upwards of $150 to $300, while doing it yourself might cost only a fraction of that—around $20 to $30 for the fluid. More importantly, keeping your brake system properly maintained ensures maximum safety and prevents more expensive repairs down the road, like replacing corroded brake lines or damaged calipers.
2. Cleaning the Intake Valves on Direct Injection Engines
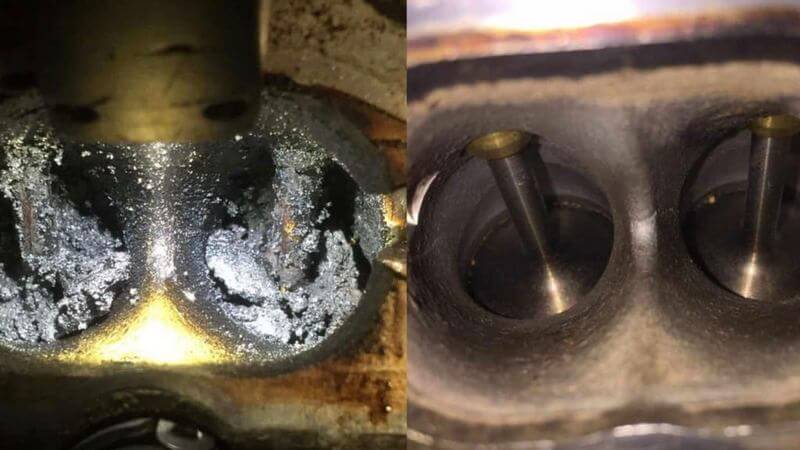
Direct injection (DI) engines are popular for their fuel efficiency and performance, but they come with a downside: carbon buildup on the intake valves. Unlike traditional fuel injection systems, where fuel helps clean the intake valves as it passes through, direct injection sprays fuel straight into the combustion chamber, bypassing the intake valves altogether. Over time, carbon deposits accumulate on the valves, which can lead to rough idling, reduced fuel efficiency, and even engine misfires.
Cleaning the intake valves yourself restores lost performance, improves fuel efficiency, and prevents costly engine repairs down the line. By taking on this task at home, you avoid expensive shop fees and keep your engine running smoothly for longer. With a bit of patience and the right cleaner, you can easily manage this at home.
Tools & Materials You’ll Need
- Repair manual (to locate the air intake components)
- Aerosol intake valve cleaner (available at most auto parts stores)
- Screwdriver or socket wrench (to remove the intake hose)
- OBD2 scanner (optional, for vehicles with fly-by-wire throttle)
- Gloves and safety goggles

Step-by-Step Instructions
- Access the Intake Valves: First, remove the air intake hose that connects to the throttle body. This hose is usually secured with clamps that can be loosened with a screwdriver or socket wrench. Once the hose is off, you'll have access to the throttle plate.
- Open the Throttle Plate: To expose the intake valves, you'll need to open the throttle plate. For cars with a mechanical throttle, just pull on the throttle cable to open it up. If your car has a fly-by-wire throttle (electronically controlled), you’ll need an OBD2 scanner to command the throttle open. Don’t have one? No problem. Have a friend turn the ignition to the "ON" position (without starting the engine) and press the accelerator pedal to open the throttle plate.
- Apply the Intake Valve Cleaner: Once the throttle plate is open, spray the intake valve cleaner directly onto the valves. Be generous and make sure to cover all the valve surfaces. Let the cleaner sit for 30 to 60 minutes to dissolve the carbon buildup. (P.s. dealerships often charge a hefty fee for this service, but you can easily handle it at home with the right cleaner and a little patience.)
- Reattach the Intake Hose: After the cleaner has had time to work, securely reattach the intake hose to the throttle body. Make sure the clamps are tight to prevent any air leaks when you start the engine.
- Start the Engine and Idle: Start the engine and let it idle for a few minutes. You might notice some smoke or a rough idle at first — this is normal. It’s just the cleaner burning off the carbon residue. Once the residue is cleared, the engine should run smoothly again.
✱ Pro Tip: Intake valve cleaners are made to dissolve carbon buildup, but they can also be harsh on your skin and eyes. Before you start spraying, make sure you’ve got protective gloves and safety goggles on. A quick splash of cleaner on bare skin can cause irritation, and you definitely don’t want to risk it getting into your eyes. Additionally, work in a well-ventilated area because the fumes can be pretty strong. Taking these precautions ensures your safety while getting the job done right.
Why This Task Is Worth It
Cleaning the intake valves yourself saves you from costly shop fees, which can run as high as $400 for this service. With just a small investment in cleaner and some patience, you’ll restore lost power, improve fuel efficiency, and prevent long-term engine damage. Plus, regularly cleaning these valves extends your engine’s lifespan, keeping performance top-notch without breaking the bank.
3. Cleaning the EGR Valve in Modern Turbocharged Engines
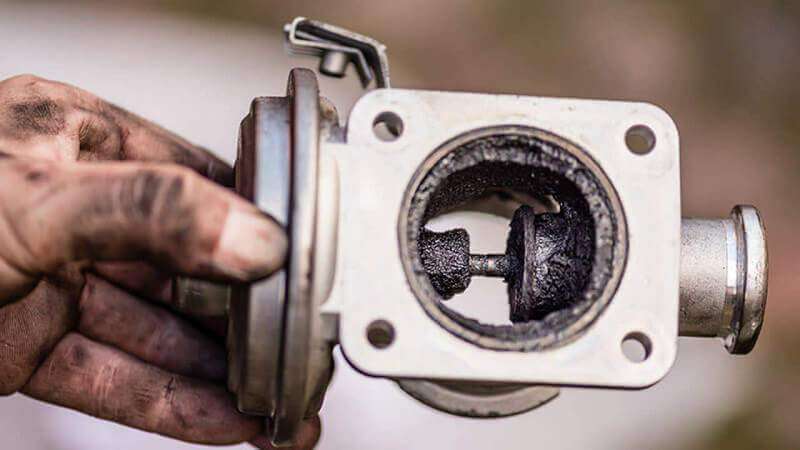
The Exhaust Gas Recirculation (EGR) valve is essential for reducing your car’s emissions by rerouting some exhaust gases back into the engine’s combustion chambers. This lowers combustion temperatures and cuts down on harmful nitrogen oxides (NOx). But over time, carbon buildup can clog the EGR valve, causing poor engine performance, higher emissions, and even triggering that dreaded check engine light. This is particularly common in modern turbocharged engines, where the extra power can create more soot in the exhaust.
Keeping your EGR valve clean prevents rough idling, improves fuel efficiency, and avoids triggering expensive repair needs. Doing it yourself saves you from the high labor costs of a shop visit and keeps your engine running clean and efficiently, helping to avoid future emissions-related repairs. This is one of those jobs that might seem intimidating, but with the right repair manual, it’s absolutely manageable.

Tools & Materials You’ll Need
- Repair manual (to locate the EGR valve and guide you through specific procedures)
- EGR cleaner (available at auto parts stores)
- Socket wrench or screwdriver
- Replacement gasket (recommended if reinstalling the same valve)
- Gloves and safety goggles
Step-by-Step Instructions
- Locate the EGR Valve: The EGR valve is usually near the intake manifold, but its exact location varies by make and model. Check your repair manual to pinpoint it. In turbocharged engines, it might be tucked deeper in the engine bay, but don’t let that scare you off — you’ve got this with a little patience.
- Disconnect the Electrical Connectors: Carefully disconnect any electrical connectors attached to the valve. These control the EGR’s operation, so be gentle and avoid damaging them. A slight wiggle usually frees them up, but refer to your manual for any specific instructions.
- Remove the EGR Valve: The valve is usually held in place by two or three bolts. Use a socket wrench or screwdriver to remove them. Once the bolts are out, gently pull the valve free. You’ll likely notice some carbon buildup around it — that’s exactly why we’re cleaning it. Sure, the valve might be buried in the engine bay, but with a couple of hours and a bit of elbow grease, you can totally nail this one yourself.
- Clean the EGR Valve: Inspect the valve for carbon buildup. Spray it generously with EGR cleaner, focusing on the heavily clogged areas. Let it sit for a few minutes, then use a soft brush or cloth to scrub away the deposits. If the valve is too clogged or damaged, consider replacing it — new EGR valves are pretty affordable.
- Reinstall the EGR Valve: Once the valve is clean (or you’ve got a new one), fit it back into place and secure it with the bolts you removed earlier. Don’t forget to install the new gasket before tightening everything up. Reconnect the electrical connectors to make sure the valve operates as it should.
- Test the Engine: Start the engine and let it idle for a few minutes. Listen for any odd sounds or rough idling that could indicate an issue. If the check engine light was on due to a faulty EGR valve, it should turn off now. If it doesn’t, consult your repair manual for further troubleshooting or use an OBD2 scanner to clear the code.
✱ Pro Tip: Never reuse the old gasket when reinstalling the EGR valve. Over time, gaskets wear out and lose their ability to create a proper seal, which can lead to leaks in the system. Leaking exhaust gases can cause performance issues, increased emissions, and could even trigger a check engine light. A new gasket is inexpensive, and replacing it now saves you from having to tear the system apart again later to fix a simple leak.
Why This Task Is Worth It
Servicing the EGR valve on your own saves you from paying $300 to $500 for a shop to do it. Not only that, but a clean EGR valve ensures smoother engine performance, better fuel economy, and lower emissions—key factors for keeping your car running efficiently and meeting environmental standards. Handling this job yourself gives you peace of mind, knowing you’ve kept a critical component in check without the high labor costs.
4. Inspecting and Cleaning Adaptive Cruise Control (ACC) Sensors and Cameras
Adaptive Cruise Control (ACC) is part of your car’s Advanced Driver Assistance Systems (ADAS), designed to help you maintain a safe distance from vehicles ahead by adjusting your speed. ACC relies on sensors and cameras to keep track of the road, but over time, these sensors can get dirty from road grime, water splashes, and debris. When that happens, the system may give false readings or even fail altogether.
Regularly cleaning your ACC sensors ensures the system functions properly and prevents unnecessary dealership visits for simple cleanings. A quick clean can save you from malfunctioning sensors, false warnings, and potentially dangerous driving situations—all while keeping your car’s safety features in top working order. You’ll be surprised how simple and fast this is to do at home.
Tools & Materials You’ll Need
- Repair manual (to locate the exact position of the sensors and cameras)
- Microfiber cloths
- Gentle automotive cleaner or camera-safe cleaner
- Compressed air (optional, for dust removal)


Step-by-Step Instructions
- Locate the Sensors and Cameras: First, find the sensors and cameras that your ACC system uses. They’re usually mounted in the front grille or bumper, though some vehicles may have them near the windshield or behind the rearview mirror. Your repair manual will point out their exact locations. While these components might seem high-tech, they’re simply mounted in spots where they’re exposed to the elements, making them vulnerable to dirt and debris.
- Inspect the Sensors and Cameras: Give the sensors and cameras a quick check to see if they’re dirty. Look for anything that could block their view, such as grime, bugs, or water spots. If they’re dirty, it’s time to clean them.
- Clean the Sensors and Cameras: Cleaning ACC sensors and cameras isn’t as complicated as some dealers might have you believe. These sensors are built to handle harsh conditions, so don’t worry about damaging them with a routine clean. Grab a microfiber cloth and gently wipe away any dirt or debris. Avoid using paper towels or anything abrasive, as they can scratch the lenses. For tougher spots, apply a bit of automotive or camera-safe cleaner to the cloth — not directly on the sensors — and wipe them down carefully.
- Check for Calibration Issues: After cleaning, check your dashboard for any warnings. In most cases, the system should function normally after a clean, but if something seems off or you see alerts, consult your repair manual for recalibration steps or use an OBD2 scanner to troubleshoot.
- Reinspect Regularly: Keeping your sensors clean isn’t a one-time job. Inspect and clean them regularly, especially if you drive in dirty or wet conditions. Aim to check them at least once a month, or more often if you’re driving through tough weather like heavy rain or snow.
✱ Pro Tip: When cleaning your ACC sensors and cameras, only use a soft microfiber cloth. These sensitive components are easily scratched by rough materials, which can impair their performance. Even a small scratch on the lens can throw off the system’s ability to gauge distances correctly, leading to false warnings or malfunctioning cruise control. Be gentle, and avoid paper towels or tissues, as they can leave behind lint or small abrasions.
Why This Task Is Worth It
Cleaning your ACC sensors is one of the simplest DIY tasks, and it’s completely free if you already have the right cleaning materials. Dealerships or mechanics may charge $100 or more for this simple job. Keeping your sensors clean ensures your car’s advanced driver assistance systems work correctly, keeping you safe and potentially avoiding accidents caused by malfunctioning sensors. It’s a small effort with huge safety payoffs.
5. Reprogramming TPMS Sensors
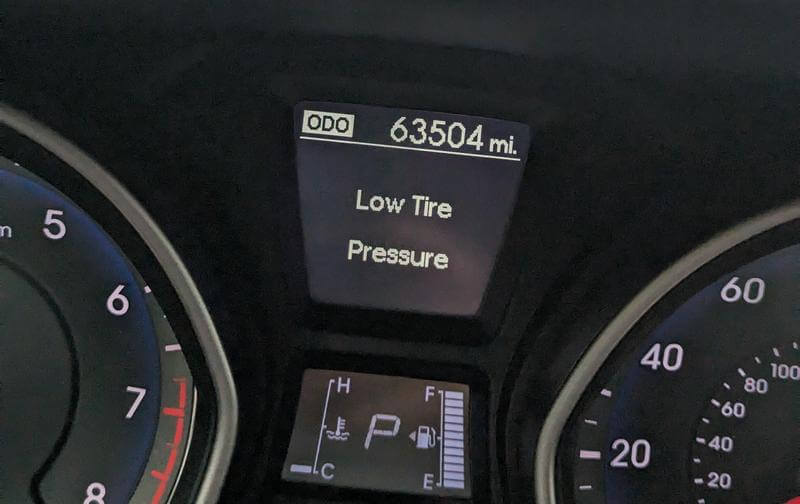
The Tire Pressure Monitoring System (TPMS) is a key safety feature in modern vehicles, designed to alert you when your tire pressure is too low. It helps prevent accidents and improves fuel efficiency by ensuring your tires are properly inflated. After replacing a tire or switching between summer and winter tires, the TPMS sensors often need to be reprogrammed or reset to sync with your car’s system. While dealerships may charge for this service, you can easily do it yourself with a bit of know-how.
Reprogramming your TPMS sensors yourself saves you the cost of dealership fees, keeps your tires properly monitored for safety, and ensures better fuel efficiency. Handling this task at home not only prevents unnecessary service charges but also gives you more control over your vehicle’s upkeep.

Tools & Materials You’ll Need
- Repair manual (for specific reset procedures)
- TPMS reset tool (if required for your vehicle)
- Tire pressure gauge (optional, to verify pressure before and after the reset)
Step-by-Step Instructions
- Determine Your Vehicle's TPMS Reset Method: Not all cars require the same reset procedure for TPMS sensors. Some vehicles, like many Toyota and Lexus models, make it straightforward with a TPMS reset button located near the steering column or glove box. For others, the reset might involve a series of button presses on the dashboard, or it could be as simple as driving under specific conditions until the system recalibrates itself. Your repair manual will have the exact steps for your car.
- Use a TPMS Reset Tool (If Necessary): Some vehicles, particularly those from brands like Ford, require a TPMS reset tool to recalibrate the sensors. This tool is relatively inexpensive and can be found at most auto parts stores. It’s a great investment if you frequently switch between different tire sets, like summer and winter tires. Simply plug the tool into your car’s OBD2 port and follow the prompts to recalibrate the sensors.
- Manual Reset Procedures: For cars that don’t need a TPMS tool, the reset may involve a manual procedure. This could mean turning the ignition to the "ON" position without starting the engine, pressing a specific combination of buttons, or driving at a certain speed for a set distance. Refer to your repair manual for the exact procedure for your vehicle.
- Check and Adjust Tire Pressure: Before resetting the sensors, make sure your tires are inflated to the correct pressure. You can find the recommended pressure in your vehicle’s owner’s manual or on the sticker located on the driver’s door frame. Use a tire pressure gauge to check each tire and adjust as needed.
- Complete the Reset: Once you’ve completed the reset procedure, the TPMS light on your dashboard should go off. If it doesn’t, you may need to repeat the steps or consult your repair manual for troubleshooting tips. If your car requires a TPMS tool, make sure to carefully follow the instructions to ensure proper calibration.
- Test the System: After resetting the sensors, take the car for a short drive and monitor the TPMS system to ensure it’s functioning correctly. The light should remain off unless there’s an actual tire pressure issue.
✱ Pro Tip: Don’t assume you need to buy expensive tools to reset your TPMS sensors—many vehicles have a simple reset procedure that you can do at home. In many cases, it’s as easy as pressing a button or following a specific set of instructions from your repair manual. By handling it yourself, you avoid dealership fees and unnecessary hassle, making tire maintenance quicker and cheaper.
Why This Task Is Worth It
Reprogramming your TPMS sensors yourself saves you from paying a dealership $50 to $100 for a simple reset. The process takes only a few minutes with the right tools and ensures your tires are always properly monitored, improving safety and fuel efficiency. Handling this task at home puts you in control and saves you time and money—especially if you regularly switch between different sets of tires.
You’ve Got This: DIY Car Maintenance Made Easy
Maintaining your car doesn’t have to mean relying on a mechanic for every little thing. Tackling tasks like reprogramming TPMS sensors, cleaning intake valves, or replacing brake fluid not only saves you money but also gives you a deeper understanding of your vehicle. With a solid repair manual by your side and the right tools in your garage, there’s no reason you can’t handle these jobs yourself.
So, the next time your car flashes a warning light or needs a bit of attention, remember—you’ve got this. Take control of your car’s upkeep, and don’t let dealerships charge you for something you can easily do at home. With a bit of knowledge and hands-on effort, you can keep your car running smoothly for years to come.
