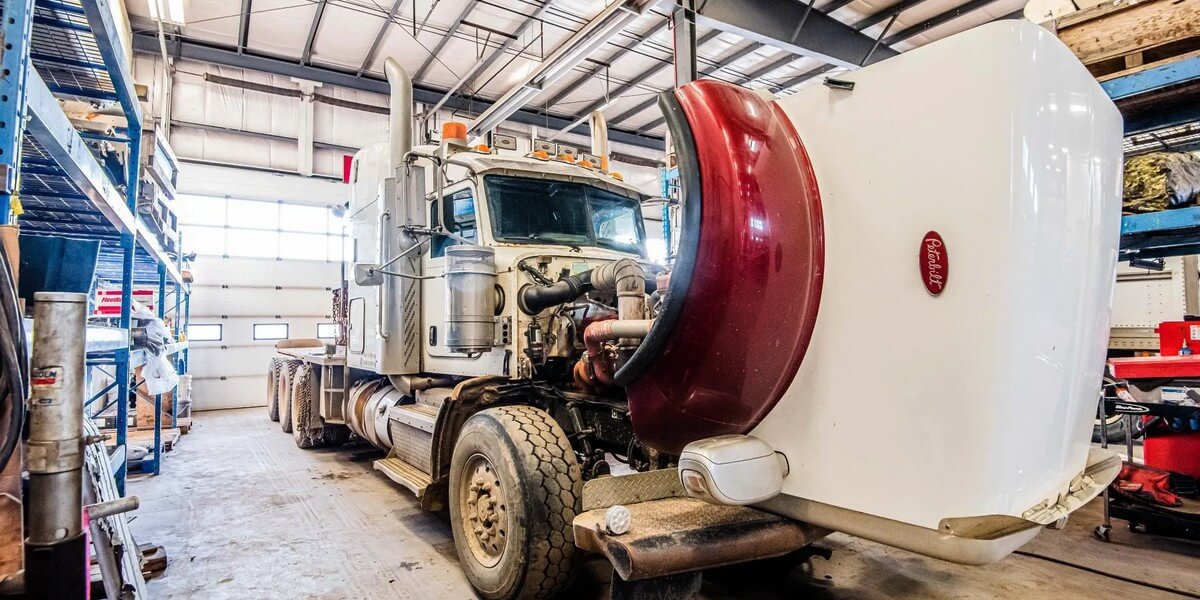
As a semi-truck owner, your rig is more than just a machine—it’s your livelihood. Every mile you drive puts money in your pocket, but when your truck is down, so is your paycheck. Every day spent waiting on repairs means missed deliveries, angry clients, and expenses piling up. And when it comes to those repair bills? You’re not just paying for parts; you’re paying for labor, markups, and lost opportunities to keep your business moving.
But here’s the good news: not every maintenance issue has to take your truck off the road, and not every repair needs a mechanic. By mastering a few essential DIY tasks, you can avoid costly shop visits, prevent breakdowns before they happen, and keep your rig in top shape—saving you both time and hard-earned cash. After all, the less time your truck spends in the shop, the more time it’s out on the road, making you money.
In this guide, we’ll cover five high-value maintenance tasks that every semi-truck driver should know. These jobs might seem daunting at first, but trust us—with the right tools and a little know-how, you’ve got what it takes to handle them yourself. Ready to keep your rig rolling and your wallet happy? Let’s get to work.
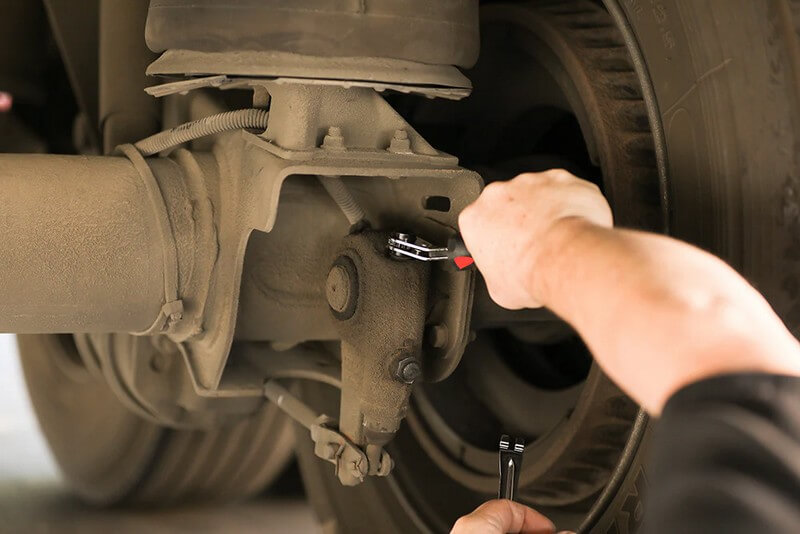
1. Adjusting the Slack Adjusters and Brakes
As a semi-truck owner, you know that brakes are everything. When they aren’t properly adjusted, you’re not just risking your safety—you’re also looking at hefty repair costs down the road. Poorly adjusted brakes wear out faster, cause uneven wear, and could lead to serious damage to your entire braking system. That’s why regularly adjusting your truck’s slack adjusters is a critical part of your maintenance routine—and here’s the good news: you don’t need a mechanic for this one. With the right tools, you can do it yourself.
Slack adjusters are part of your truck’s air brake system, keeping the brakes properly aligned as they wear down. There are two types: manual and automatic. Manual slack adjusters need periodic adjustments, while automatic ones generally self-adjust but can sometimes fall out of alignment. If your slack adjusters aren’t calibrated correctly, your stopping distance increases, your brake shoes wear unevenly, and before you know it, you’re facing significant repair costs.
By adjusting your slack adjusters regularly, you’re not only ensuring your safety on the road but also preventing uneven wear, extending the lifespan of your brakes, and saving yourself from costly repairs. Shops typically charge between $150 to $300 for a brake adjustment, but with a wrench and a few minutes of your time, you can handle it yourself for free. That’s money saved, and more time spent on the road rather than waiting for your truck to be serviced.
Tools You’ll Need
- Repair manual: Provides the specific torque settings and adjustment procedures for your truck’s braking system.
- Wrench set: Essential for adjusting manual slack adjusters. A basic set costs between $20 to $50.
- S-cam tool: This specialized tool makes adjustments easier. Priced around $30 to $60, it’s a worthwhile investment, especially when brake adjustments at a shop can run $150 to $300.
- Safety gear: Gloves and eye protection are a must for handling brake parts.

Step-by-Step Guide to Adjusting Slack Adjusters
- Safety First: Park on a level surface, engage the parking brake, and use wheel chocks to prevent movement.
- Locate the Slack Adjusters: They’re near the wheels, connected to the air brake chamber. The repair manual will pinpoint their exact location if you’re unsure.
- Check for Movement: Move the slack adjuster by hand. You should feel resistance and only a little play. If it moves more than 1 inch, it needs adjustment.
- For manual slack adjusters, turn the adjustment bolt clockwise in small increments, checking the free play until it’s under 1 inch.
- For automatic slack adjusters, apply and release the brakes several times to reset the adjuster. If the play remains excessive, inspect it for wear and consider replacing it.
- Test the Brakes: After adjustments, release the parking brake and move the truck forward a few feet. Listen for any unusual sounds and make sure the brakes respond properly.
How Often Should You Adjust Slack Adjusters?
- Manual slack adjusters: Check and adjust every few weeks or whenever you notice brake performance changes.
- Automatic slack adjusters: Inspect during routine maintenance. They usually don’t require adjustment unless there's an issue.
2. Air Dryer Desiccant Cartridge Replacement
Your semi-truck’s air brake system depends on clean, dry air to function properly, especially when driving through tough weather like rain, snow, or humidity. The air dryer removes moisture from the system, preventing corrosion and potential brake failure. But over time, the desiccant cartridge inside the air dryer becomes saturated with moisture, losing its ability to protect your air brakes. Regularly replacing this cartridge is essential to keeping your air brake system in top shape.
If the desiccant cartridge isn’t replaced, moisture builds up in your air lines, leading to corrosion, freeze-ups, and even catastrophic brake failure—especially in colder climates. And let’s be honest: brake failure on a semi-truck isn’t just dangerous, it’s expensive. Shops might charge hundreds for repairs that you could easily prevent by swapping out the cartridge on your own.
Replacing the desiccant cartridge yourself ensures that your brakes stay reliable and safe while avoiding massive repair bills down the road. It’s a relatively simple DIY task that can save you hundreds, if not thousands, in brake repairs. With cartridges costing between $50 to $100, you’re spending a little now to save a lot later.
Tools You’ll Need
- Repair manual: Use the manual to locate the air dryer on your specific model, and for step-by-step instructions on safely servicing the air system.
- Wrench set or socket set: A good-quality wrench or socket set is necessary to remove the air dryer. A set typically costs $20 to $50—much cheaper than the $200 or more you'd pay at a shop.
- Replacement desiccant cartridge: Depending on your truck, cartridges usually run between $50 and $100. Using a high-quality cartridge helps extend the life of your brake system.
- Safety gear: Gloves and safety glasses are essential when working with brake components.
Step-by-Step Guide to Replacing the Air Dryer Desiccant Cartridge
- Safety First: Park the truck on a level surface, engage the parking brake, and drain the air pressure by pumping the brake pedal several times.
- Locate the Air Dryer: The air dryer is typically mounted on the truck’s frame, near the air compressor. It’s a cylindrical unit, and the desiccant cartridge is screwed onto the top.
- Remove the Air Dryer: Use your wrench or socket set to remove the bolts securing the air dryer to the frame. Carefully disconnect the air lines, as they may still hold pressure. Wear gloves and eye protection.
- Remove the Old Cartridge: Unscrew the desiccant cartridge by hand or with a strap wrench if needed. Check the old cartridge for signs of excessive moisture or damage.
- Install the New Cartridge: Clean the mounting area, then screw the new desiccant cartridge into place. Make sure it’s secure but avoid overtightening to prevent damage.
- Reinstall the Air Dryer: Reattach the air dryer to the frame and reconnect the air lines. Tighten the bolts and ensure all connections are secure—loose connections can cause leaks.
- Check for Leaks: Start the truck and pressurize the air system. Listen for any hissing sounds that could indicate a leak. If there’s a leak, shut down the system and check the connections again.
- Test the Brakes: After the replacement, take the truck for a short drive to ensure the brakes are functioning properly and the air system is cycling correctly.
When Should You Replace the Desiccant Cartridge?
Most manufacturers recommend replacing the desiccant cartridge every 12 months or 100,000 miles, whichever comes first. If you operate in harsh conditions, such as extreme cold or humidity, you may need to replace it more frequently.

3. Greasing the Fifth Wheel
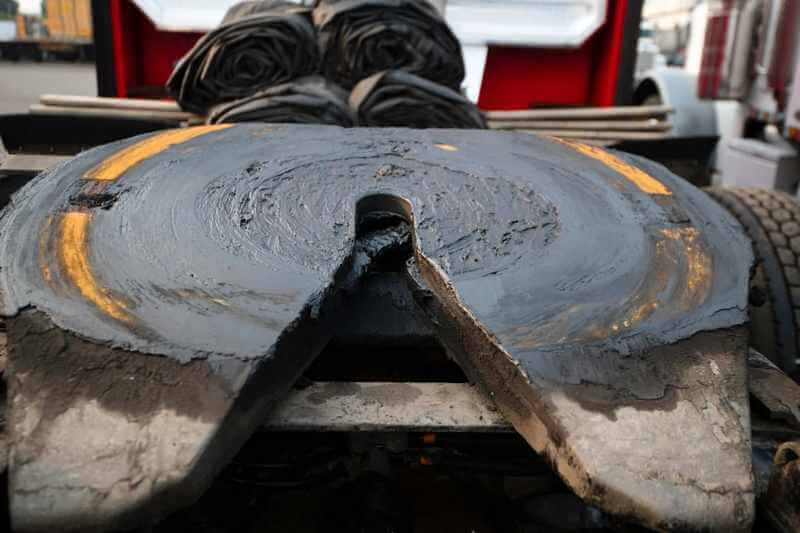
Your fifth wheel is one of the most crucial components of your semi-truck, responsible for connecting the tractor to the trailer and ensuring smooth, safe movement. Over time, constant friction wears down the metal surfaces, and without regular lubrication, this can lead to severe damage or even a dangerous coupling failure. Greasing your fifth wheel is a simple but essential task that keeps everything moving smoothly and prevents expensive repairs.
If neglected, you risk fifth-wheel damage that could cost thousands of dollars to fix. The good news is that regularly applying grease to the fifth wheel prevents wear, reduces friction, and ensures reliable towing performance. A $15 grease cartridge and a few minutes of your time can save you from breakdowns, dangerous situations, and costly repairs. Doing this yourself means fewer trips to the shop and more money staying in your pocket.
Tools You’ll Need
- Repair manual: Your manual will give you details on how often to grease the fifth wheel, what type of grease to use, and how to inspect the fifth wheel for damage.
- Grease gun: A manual grease gun costs between $25 and $50. For faster, easier work, consider a pneumatic or electric grease gun ($50 to $150).
- High-quality grease: Use heavy-duty grease designed for fifth wheels—typically $10 to $15 per cartridge. Make sure it’s water-resistant and rated for high pressure and temperatures.
- Safety gear: Gloves are essential since greasing can get messy. Have rags on hand for cleanup.
Step-by-Step Guide to Greasing the Fifth Wheel
- Safety First: Park on a level surface, engage the parking brake, and uncouple the trailer from the tractor. Ensure the area is well-ventilated, especially if using a pneumatic grease gun.
- Inspect the Fifth Wheel: Check for any visible damage like cracks, excessive wear, or rust. Also, check the locking jaws to ensure they’re functioning correctly. If you notice any major issues, address them before greasing.
- Clean the Fifth Wheel: Remove old grease, dirt, or debris using a wire brush or scraper. Wipe the surface down with a rag to ensure the new grease will spread evenly.
- Apply Grease: Attach the grease cartridge to your grease gun. Apply a generous amount of grease to the fifth wheel plate—the flat surface where the trailer rests. Spread it evenly with a rag or your gloved hand. Don’t forget the kingpin slot (the groove where the trailer’s kingpin fits).
- Grease the Jaws and Pivot Points: Use your grease gun to grease the locking jaws that hold the kingpin in place. Also, apply grease to any pivot points or moving parts around the fifth wheel.
- Test the Application: Re-couple the trailer and move the truck back and forth slightly to spread the grease evenly. Listen for any unusual sounds or grinding, which might indicate more grease is needed or a mechanical issue.
- Clean Up: Wipe away excess grease to prevent dirt and debris from accumulating. Excess grease can also spread to other components where it’s not needed.
How Often Should You Grease the Fifth Wheel?
Grease your fifth wheel every 3,000 to 5,000 miles or whenever you uncouple the trailer. If you’re driving in wet or dusty conditions, grease it more often. Regularly check for wear or dryness during your maintenance routine.

4. Replacing Fuel Filters
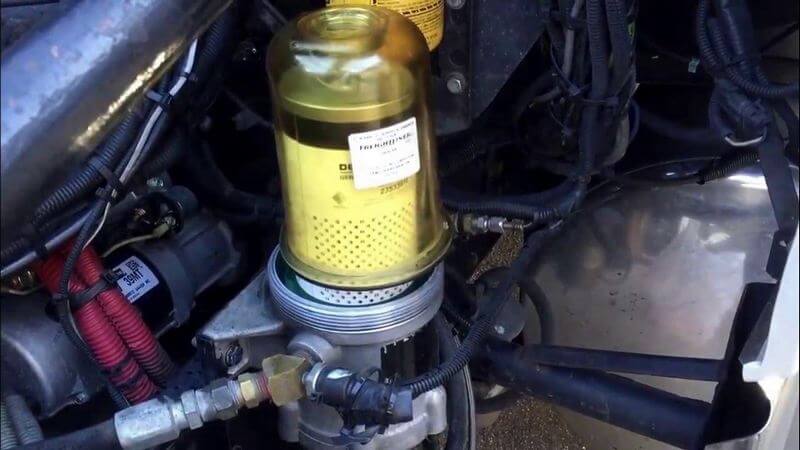
Fuel filters might not seem like the most glamorous part of truck maintenance, but they’re crucial to keeping your engine running at its best. They trap dirt, rust, and debris before it reaches your engine, preventing damage to key components like fuel injectors. Over time, though, these filters get clogged, leading to reduced engine performance, poor fuel efficiency, and potentially even a breakdown. And when your truck isn’t moving, neither is your income.
Regularly replacing your fuel filters ensures that your engine gets the clean fuel it needs to maintain power and reliability. Shops might charge $200 or more for a filter replacement, but with a wrench and about 30 minutes, you can do it yourself for a fraction of the cost. A few bucks and a bit of effort now could save you thousands in repairs later, making this a task well worth your time.
Tools You’ll Need
- Repair manual: Refer to the manual for specific fuel filter locations, replacement procedures, and priming instructions.
- Wrench or socket set: Basic wrench or socket sets run between $20 and $50.
- Fuel filter wrench: Some filters require a special wrench, still pretty inexpensive at around $10 to $20.
- Replacement fuel filters: Depending on your truck model, filters range from $15 to $60. Most trucks have two filters: primary and secondary.
- Gloves and safety glasses: Fuel is hazardous, so protect your hands and eyes.
- Container for old fuel: An oil drain pan, priced around $10, works well for catching old fuel.
Step-by-Step Guide to Replacing Fuel Filters
- Safety First: Park on a level surface, engage the parking brake, and turn off the engine. Let it cool down. Wear gloves and safety glasses. Have a container ready to catch any spilled fuel.
- Locate the Fuel Filters: Most trucks have a primary filter near the fuel tank and a secondary one closer to the engine. Check your manual if needed.
- Relieve Pressure: Relieve the fuel system pressure by opening a drain valve or vent on the filter housing. Be cautious—fuel may spray initially.
- Remove the Old Filters: Use your wrench or fuel filter wrench to unscrew the old filters. Catch any spilled fuel with your container. Pay attention to how the filters are oriented for proper reinstallation.
- Install the New Filters: Fill the new filters with clean diesel to prevent air from entering the fuel lines. Install them, hand-tightening first, then use the wrench to snug them up.
- Prime the Fuel System: After installation, prime the system to remove any air. Use the manual primer pump near the filters until you feel resistance or see fuel flowing without air bubbles.
- Check for Leaks and Test the Engine: Start the engine and let it idle for a few minutes. Check around the filters for leaks. If everything looks good and the engine runs smoothly, the job is done.
When Should You Replace Fuel Filters?
Fuel filters should be replaced every 15,000 to 25,000 miles, depending on your truck model and driving conditions. If you notice reduced power, poor fuel economy, or trouble starting, change the filters sooner. Regular maintenance prevents bigger issues, so stick to a consistent schedule.
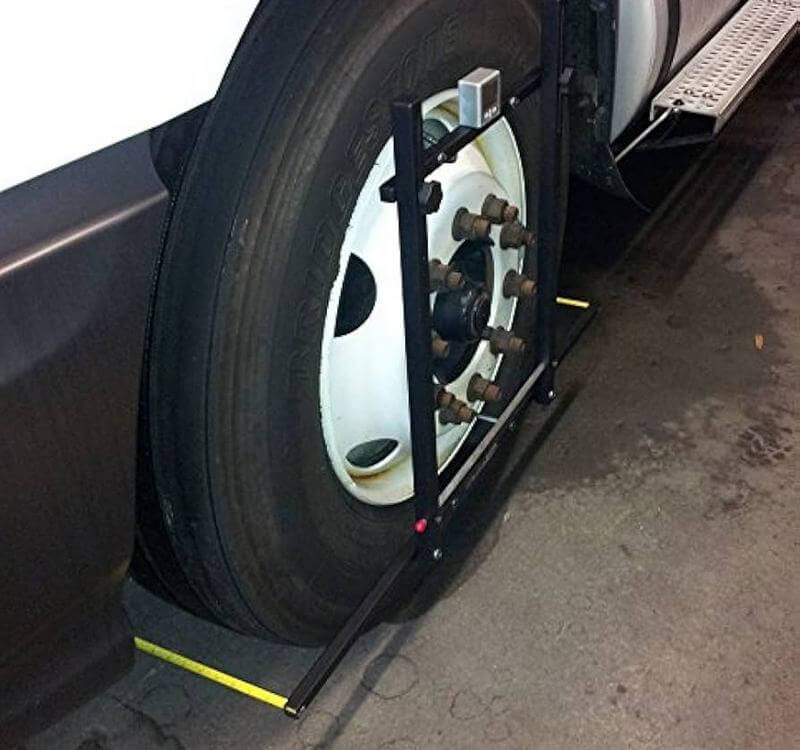

5. Checking and Adjusting Tire Pressure and Wheel Alignment
Proper tire pressure and wheel alignment are crucial for your semi-truck’s safety, performance, and fuel efficiency. If your tires are under-inflated or over-inflated, you risk uneven wear, blowouts, and poor handling. Misalignment, on the other hand, causes uneven tire wear, steering issues and can even increase the chances of accidents.
Regular checks of both tire pressure and alignment can help you avoid costly tire replacements and blowouts and ensure your rig is running smoothly. While a professional alignment costs $200 to $300, a DIY alignment tool can help you catch misalignment issues between professional services, saving you money on premature tire wear. A bit of maintenance here can keep you rolling safely and efficiently for miles to come.
Tools You’ll Need
- Tire pressure gauge: A reliable digital or analog gauge is a must. For semi-trucks, you need a heavy-duty gauge that can handle pressures up to 120-130 psi. These typically cost between $20 and $50.
- Air compressor: Semi-truck tires run at 100-110 psi, so you need a powerful compressor capable of reaching these pressures. A high-capacity compressor suitable for semi-truck tires, especially one capable of inflating up to 120-130 psi, would typically cost between $300 and $600. Portable 12V plug-in compressors designed for heavy-duty truck use can range from $150 to $400, depending on the brand and features, but they may take longer to inflate the tires compared to larger, stationary models.
- Heavy-duty jack and jack stands: For alignment checks, a truck-specific jack costs between $150 and $500.
- String or alignment gauge: Use a string for basic alignment checks or a DIY tire alignment tool, which costs between $20 and $100. Having it done professionally at a shop is also an option, but it’s expensive, so we won’t go into that.
- Repair manual: Provides the alignment specs for your truck, along with detailed diagrams for accurate alignment checks and adjustments.
Sure, the upfront costs for the tools for these specific jobs are on the higher side, but you’ll avoid paying $100 to $150 per tire in premature wear or even more if a blowout occurs. Not to mention if done professionally, alignment can cost between $200 and $300. In the end, you can’t help but save money by going the DIY route.
Step-by-Step Guide to Adjusting Tire Pressure
- Safety First: Park on a level surface, engage the parking brake, and ensure the tires are cool before checking the pressure (heat can give inaccurate readings).
- Locate Recommended Tire Pressure: Find the recommended PSI in your manual or on a placard located on the driver’s side doorjamb.
- Check the Tire Pressure: Remove the valve cap and place your gauge on the valve stem. Compare the reading to the recommended PSI. Add or release air as needed.
- Adjust the Tire Pressure: Use the air compressor to fill the tire to the correct PSI. If over-inflated, use the gauge to release air until the correct pressure is reached.
- Check for Leaks: After adjusting, inspect the valve stem for leaks by applying soapy water and looking for bubbles. Replace the valve stem if necessary.
How to Perform a Basic Wheel Alignment Check
While a professional alignment every 6 months or after major suspension work is a smart move, regular DIY checks in between can help you catch issues early and keep your rig running smoothly. Here’s how you can do a quick alignment check at home:
- Inspect Tire Wear: Uneven tire wear often signals misalignment. Check for excessive wear on the inside or outside edges of the tires.
- Use the String Method: Park on a flat surface. Run a string along the tires at the same height on both front and rear tires. The string should touch the sidewalls of both tires evenly. If it doesn’t, your wheels may be misaligned.
- Adjust Toe Alignment (If Comfortable): If you feel confident, you can adjust the toe alignment by turning the tie rods, which connect the wheels to the steering system. Mark the current position of the tie rod before making small adjustments.
- Test Drive: After adjustments, test drive the truck. If it pulls to one side or the steering feels off, further adjustments may be needed.
When Should You Check Tire Pressure and Alignment?
You should check your tire pressure weekly or before long trips to ensure optimal performance. This helps you avoid blowouts, improve fuel efficiency, and extend the life of your tires. As for alignment, it’s smart to do a DIY check every few months or whenever you notice symptoms like uneven tire wear, pulling to one side, or vibrations in the steering wheel. A professional alignment should be done every 6 months or 12,000 miles, especially if you’re driving long distances or hauling heavy loads.
Keep Your Rig Running Right
Owning a semi-truck means taking full control of your rig’s health—and your income. By mastering these essential DIY maintenance tasks, you’re not just preventing breakdowns; you’re keeping your truck on the road and your wallet from bleeding out at the repair shop. Regular upkeep means fewer surprises, fewer costly repairs, and way more time spent doing what you do best—hauling loads and earning money.
Don’t let small issues snowball into major expenses. Whether it’s keeping your brakes sharp, your tires aligned, or your fuel system running smoothly, each task you handle yourself puts more control—and more cash—back into your hands.
Bottom line: the more time and effort you invest in maintaining your rig, the longer it stays on the road, and the more money stays in your pocket. So, keep up with these tasks, and your truck will keep doing what it’s meant to—make you money.
