Who knew you could learn how to paint a car DIY easily with just a few simple steps!
Painting a car seems a hard job that only professionals can do. But if you are a DIY enthusiast then I’m sure you might have dreamt about painting your car just like you do all other DIY projects. Painting a car may sound a bit difficult but that doesn’t mean you can’t do it yourself. With this step by step guide of painting a car, everyone can do it! After following all these steps, you can enjoy your sweet ride looking as good as new. The process is not only easy but you will also enjoy the whole process.
You can paint a car with some easily available paints and other stuff that you can find in your local hardware store. If you prefer, you can also buy everything online. It would be better to paint your car in the garage where it is safe from dust, rain, etc. But if you don’t have enough space in your garage, then do it in any wide space you have available. You will feel so proud of yourself once you are done with painting your sweet ride!
How To Paint A Car With Spray Cans?
Most of the people prefer spray paint when it comes to painting a car. This is because spray cans are quite handy. They are easy to use and you can buy them from your local departmental store without any problem. When you paint a car with spray cans, you will need to do 2-3 coats of paint for a smooth and even look. When one coat is dried off completely then do the other. You will have to wait almost an hour for one coat to dry out. You will need 7-8 liter of paint for a regular-sized car. So buy the spray cans keeping this information in mind so, you don’t run out of paint.
Paint Car DIY Project
No extra labor is required for painting a car when you are planning to do it yourself. You just need to prepare your working area, gather all the needed stuff, and follow some easy steps. You will need almost a gallon of primer, 2 gallons of paint (7.5 liters), and 2-3 gallons of clear varnish. Keep in mind that the whole process will take some time because everything needs to be dried off completely. This is a great activity that you can do on a weekend. So, keep your weekend free for this.
Here is how you can work on painting a car DIY project:
Step 1: Gather What You Need
Painting a car by yourself requires some tools and materials. So, first of all, you need to gather everything before painting so you won’t have to stop painting midway because you don’t have enough materials. If you are a DIY enthusiast, then you’ll already have most of these items at your home.
For this project, you’ll need:
- Thinner
- 80 grit sandpaper
- 2000 and 1200 grit sandpaper
- Filler
- Acrylic varnish
- Spray cans
- Masking paper
- Primer
- Safety goggles
- Piece of cloth
- Polish
Step 2: Choose The Painting Area
The second step to paint a car is to choose the right painting area. This step is very important because you don’t want to make a mess or destroy other things while you’re painting a car. You will need a spacious and properly ventilated area. If you are painting your car in a garage, make sure you have no heaters or chimneys that can cause fire hazards. If you are painting your car outdoors, make sure that the place has electricity.
Step 3: Clean Your Car
If you want the paint to last long you need to prepare your car well. If there is any rust, scrape it down. Clean the surfaces of the car with thinner to make sure there is no dust or grease. Dust will ruin the paint and your car won't look as shiny as it should. If you have time you should wash your car with water and let it stand for a day before getting to the next step.
Step 4: Apply Filler
Apply car filler evenly on all the surfaces. While applying the filler on the car surface, make sure that there are no highs and lows on the metal. The filler will fill in all the dents and dings. You will have to sand again with 80 grit sandpaper to remove the extra filler.
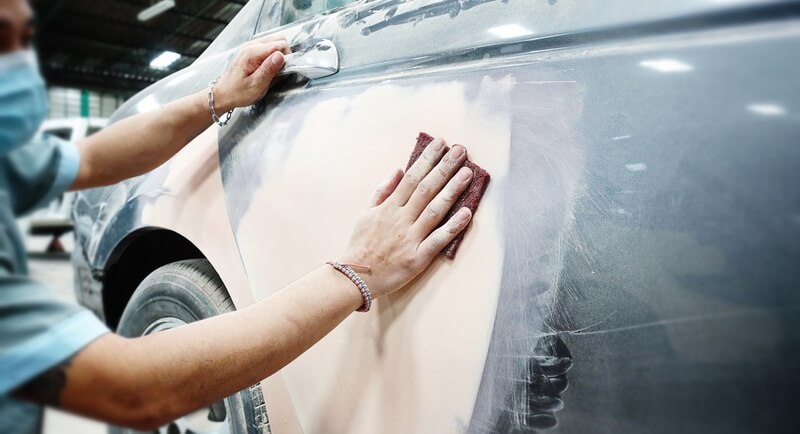
Step 5: Sanding
Sanding helps to make a smooth surface for painting. By using 80-grit sandpaper, strip your car from its previous paint in circular motions. It is better to sand up to the bare metal but if you don’t have time you can sand up to its original primer. However, bare-metal provides a better surface for the paint to stick properly.
Step 6: Mask Your Car
Use masking paper on all the parts of the car which you don’t want to paint like windows, lights, windshield, door handles. Some people also use a newspaper but using one layer of newspaper is not recommended because paint can easily go through that. At least use 2-3 layers if you don’t have masking paper.
Step 7: Primer Time
Once you are done with applying filler, now is the time to apply primer which will provide a corrosion-free car surface.
Step 8: Sandpaper Again
Use 1200 grit sandpaper to finely sand the surfaces. You need to be very careful and don’t sand too much or you will strip your car from a corrosion-free primer.
Step 9: Wipe Everything
All the residual or metal particles should be wiped by a piece of cloth soaked in thinner.
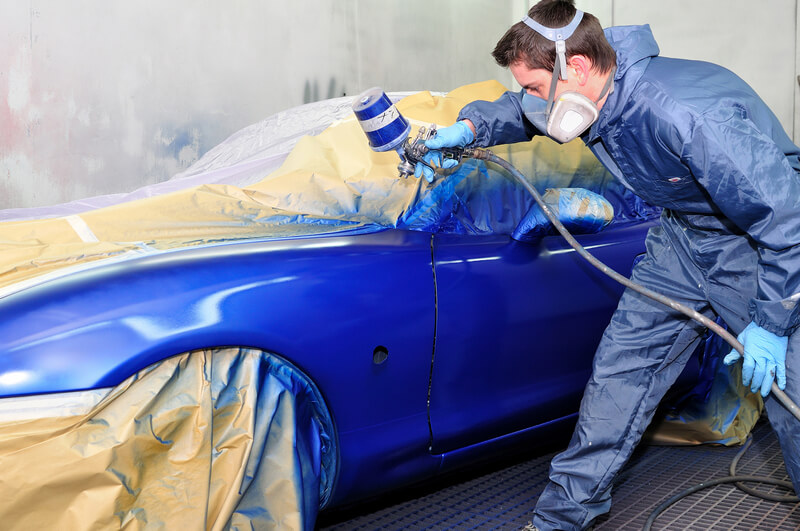
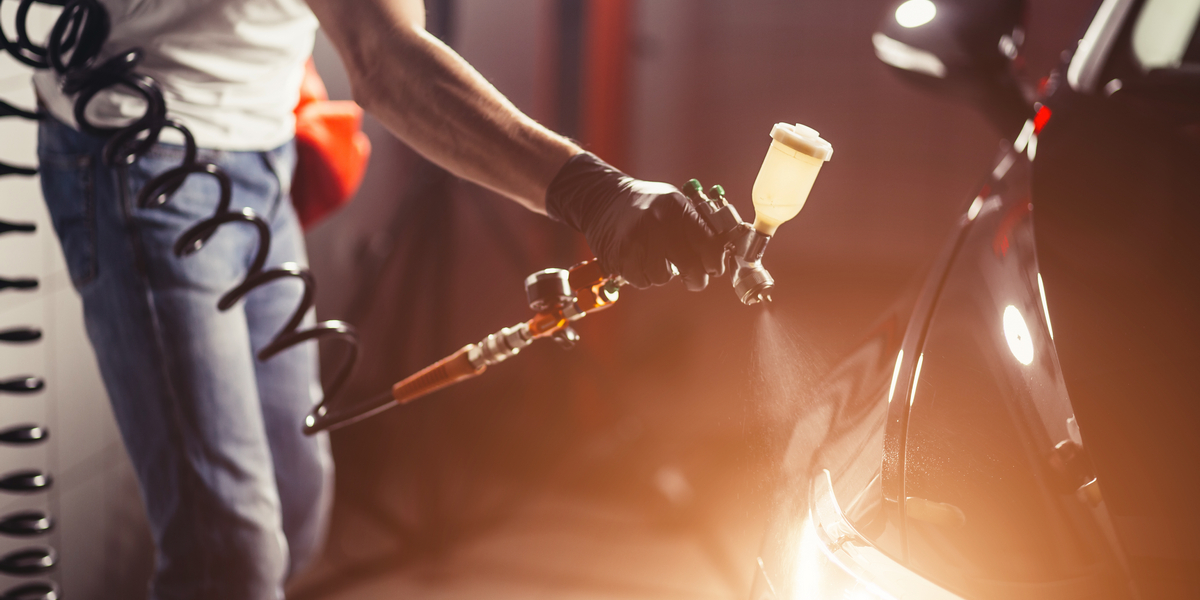
Step 10: Paint
While using spray paint, keep it 5 inches away from your car during spraying. Apply the paint evenly from side to side motion. It will take almost 2-3 hours to completely paint a regular-sized car. Now let it dry for almost an hour or so. Apply another coat of paint after the first one is dried. Just a little more work and you’ll be done!
Step 11: Apply Clear Coat
After the paint is dried out you will need to apply acrylic varnish or clear coat as a protective shield. The varnish can be applied in the same way as you applied the paint.
Step 12: Remove Masking Paper
You will have to remove the masking paper when the varnish is still wet. Do it carefully with easy hand movements. Don’t worry we are almost done now.
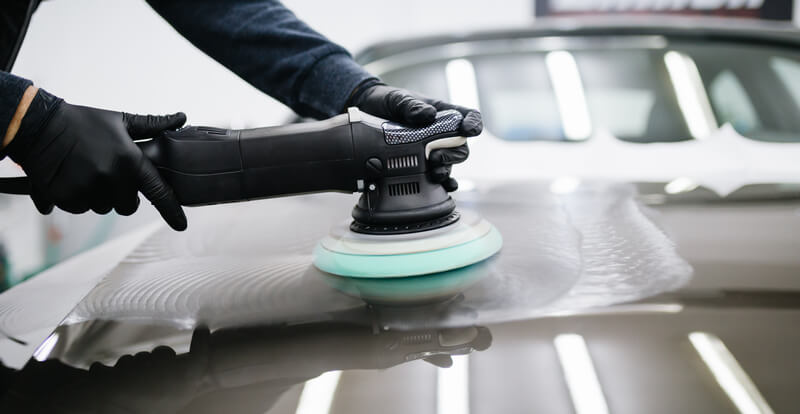
Step 13: Final Polishing
As your last step, apply polish with a piece of cloth to all painted surfaces to give your car a brand-new look. Your car is now ready!
Benefits Of Paint A Car DIY
Here are some benefits of doing a DIY car painting project:
- You will save tons of money.
- Your free time will be spent productively.
- Because it’s your car, you will be extra careful while painting it making sure there are no damages.
- Small dents and scratches will be removed easily by this DIY project.
- All the products like spray cans, varnish, etc. are easily available from local shops.
- By painting your car, you can make it look like a brand-new vehicle in no time.
- You will have a lot of fun while doing this DIY project.
Hacks To Paint A Car
Here are some hacks that are quite useful when it comes to painting your car:
- Stripping with sandpaper to bare metal will allow you to see any rust, body fillers, or poor-quality repairs that were hidden under paint.
- Take apart as many parts of the car as you can because parts can be painted better if they are separated especially bumper. This is the best way to paint a car with spray cans.
- Use high-quality masking tape or masking paper but if you don’t have it then don’t worry. You can use double or triple layers of newspaper or plastic sheets.
- 80 grit sandpaper is for coarse sanding while 1200 or 2000 grit is for light scraping of car surfaces.
- Make sure to mix filler on paper or plastic. If you use cardboard, the filler will stick to it.
Quick Recap
In the end, here is a quick recap of the things that you will need to do to paint a car DIY. The list below can also serve as a checklist for you while painting your car.
- Gather all the required materials first and choose a spacious painting area.
- Clean and sand your car to get a smooth coat of paint.
- Mask the parts that you don’t want to paint.
- Apply car filler and once you’re done with that, apply the primer.
- Sand the car surface and then wipe all the extra material.
- Apply 2-3 coats of paint for a smooth finish. Once the paint is dried out, apply varnish.
- Remove the masking paper and apply polish to give your car a finishing touch.